")


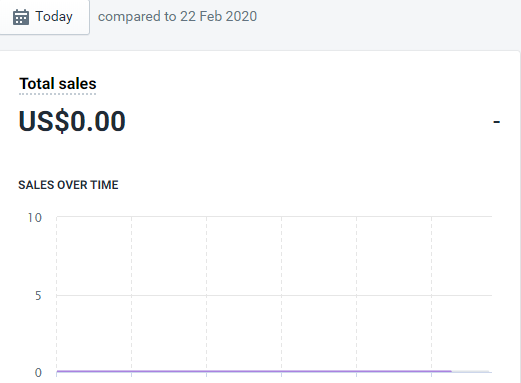
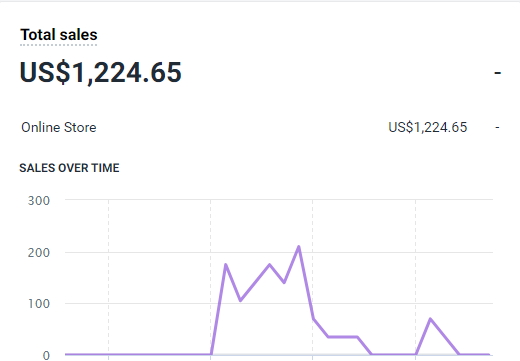
Almost every dropshipper out there experienced this phenomenon – You launch a new campaign and in the first 2-3 days you get actual sales and profit. But then it suddenly all turns to shit(excuse my french), and your campaign just tanks ?
From getting sales and actual profit, you’re now losing money or in best case scenario, only breaking even…
So why does it happen and what can we do about it? Is it our fault or it’s just Facebook’s algorithm going crazy? In this week’s article, I’m going to answer these questions and show you what can you possibly do to start getting sales again.
And if you have an old winner that made good sales in the past, you can revive it again by using some of the techniques in this article.
Make sure to read the whole article because there’s a little bonus at the end ?
From Getting Good Sales On Day One To Nothing On Day Two – Why Does It Happen?
I wish I had a definite answer for you but unfortunately I don’t. When it comes to testing products with Facebook ads, the one thing probably a lot of Dropshippers desire most is having stable working campaigns.
There are plenty of reasons your campaign can do well on the first day and tank on the second:
1. You deal with actual people – Your ads are shown to real people and not some kind of money spending robots. It can be that on the first 2 days of running your ad, you were lucky enough to get a good audience that had the time to visit your store and order your product.
On the third day, it didn’t go well because the audience just wasn’t ready to order – Maybe your ad reached a mother who really liked your product and was about to order, but she didn’t have time because her kids were driving her crazy. Or maybe your ad reached a Husband who was at work at that time and his Boss was sitting on his neck, thus not allowing him 5 minutes of free time to order your product.
You have to remember we deal with real people and these are real life scenarios that happen everyday.
2. Facebook Algorithm – Yep, in some cases we can totally blame Facebook for our lack of sales. Facebook delivers our ads to relevant people and sometimes it can start well when it finds a good chunk of buyers for us. Then it can suddenly test different audiences, not so relevant ones, thus getting us to nowhere and only wasting our money. And Facebook, like all systems, isn’t bug free so we can expect it to sometimes go a bit crazy and bring us junk traffic.
3. Your ad isn’t good enough – You might think your ad is perfect but it actually isn’t… Two or Three sales on the first day isn’t a guarantee you have it all figured out. There’s a chance it was pure luck that you received these sales, but the next group of people who will see your ad won’t be that interested.
Here’s a quick example to make stuff more clear: From a group of 100 people looking at your product, there’s a chance your ad was shown first to the 3 people who just buy junk and enjoy doing it. The next 97 are good buyers but your ad just wasn’t interesting enough for them to even click on it. They didn’t feel any need or urgency, they thought it was cool but not cool enough to buy it right now.
4. Payment issues – Sometimes payment providers have issues and because of that you lose sales. Sometimes customers you reach have weird issues too with their credit cards or PayPal accounts. Stuff like these can happen and it’s important to know how to identify these issues.
And of course, the regular reasons like choosing the wrong products to sell – Even if you get some sales right from the start, it doesn’t mean it’s a winning product for sure! Other smaller issues and even some conspiracy theories I won’t mention here…
So What Can We Do About It?
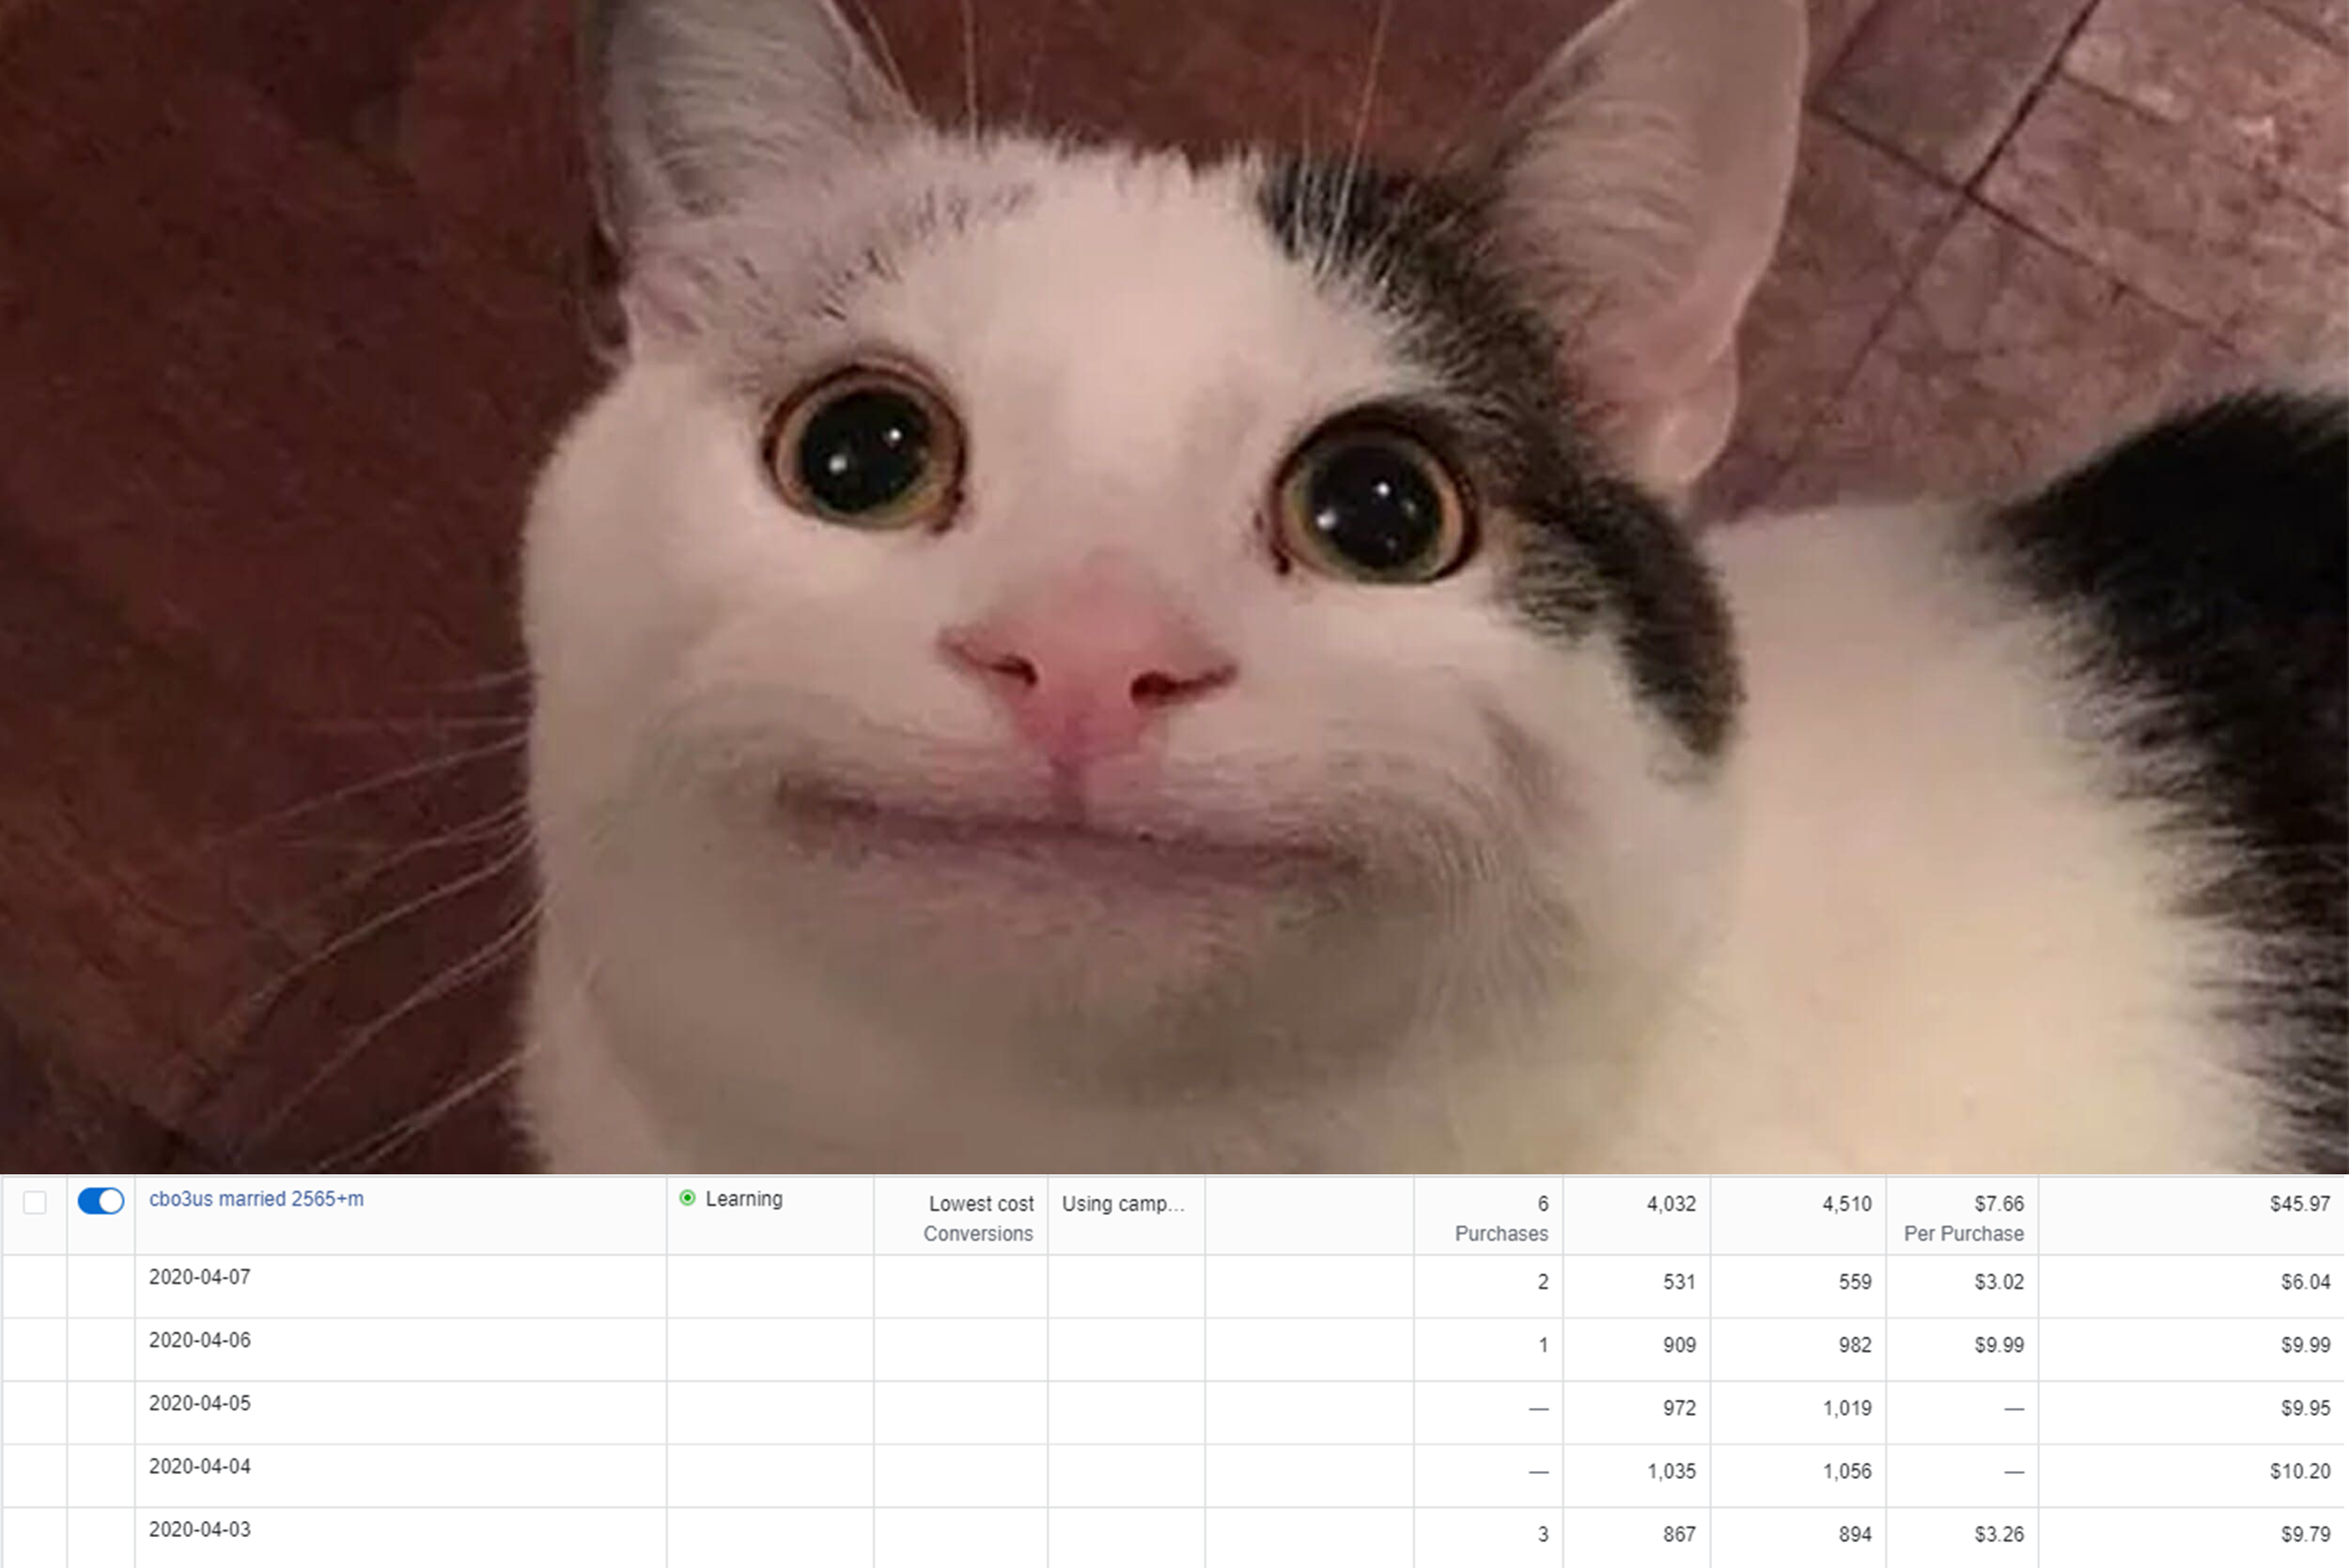
1. Give Facebook some time to do it’s job – Facebook takes its time to learn about our audience and it’s constantly testing different audiences while our ad is running to see which one performs best. It can be that for the first few days Facebook will hit the right audience, but for the next days it changes something and your sales tank. So my first tip is to give Facebook enough time to optimize… Be prepared to lose some money but it should be performing well on the long run.
2. Change your creatives – As I told you above, there’s a chance your ad just isn’t good enough. You can have a great video ad that explains every feature of the product but the first 3 seconds, which are really important, are not catchy enough and fail to grab the attention of your target audience. So by changing the first few seconds on the beginning of your video, you can suddenly see a drastic change on the amount of clicks you get and eventually sales.
Test different video ads in one adset to see which one performs better. Test different types of ad creatives like photo ads, carousel ads, and more. People tend to test only one type of ad creatives and this is a mistake.
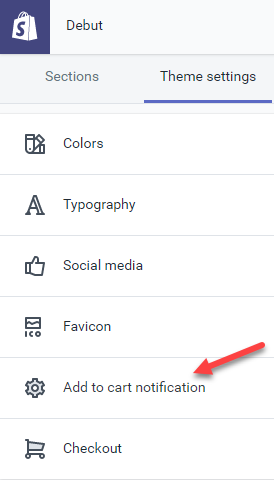
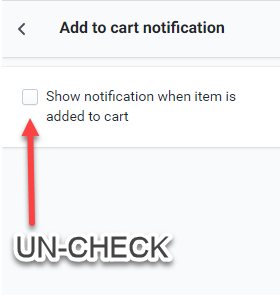
3. Double check your payment gateways – Do a test purchase on your store even if you already had some that gone through. It could be a country you forgot to setup in the shipping settings or just a temporary bug with PayPal/Stripe. Shopify shows you if there was an attempt to purchase something and it failed.
4. Shut it down for a week or two and try again – Like I said, Facebook sometimes has bugs and it could help if you stop your ads for a week or even two till it blows off. Then launch your ads again(from scratch) and see if that helps.
5. Change your product link – This is a strange one but it helped me restart old POD campaigns I had. By changing the link of my product to something new, I was able to restart my campaign and get sales. It’s like a refresh, a bit strange but it worked for me and for other dropshippers I know.
Example:
If this is your product link – “mystore.com/products/calmdogbed”, change it to “mystore.com/products/bestcalmingdogbed”.
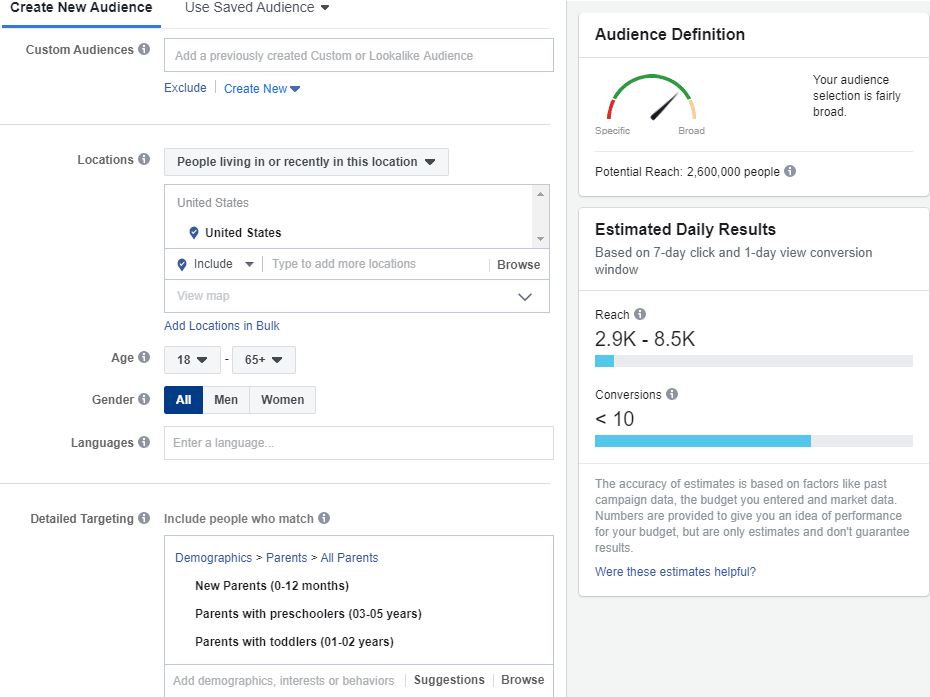
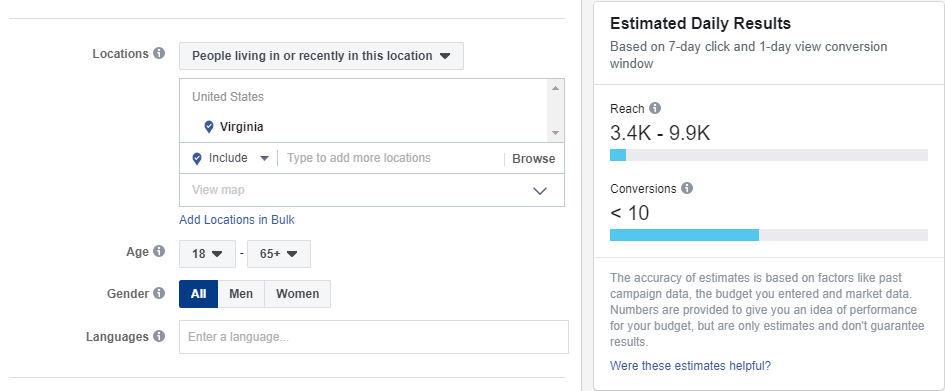
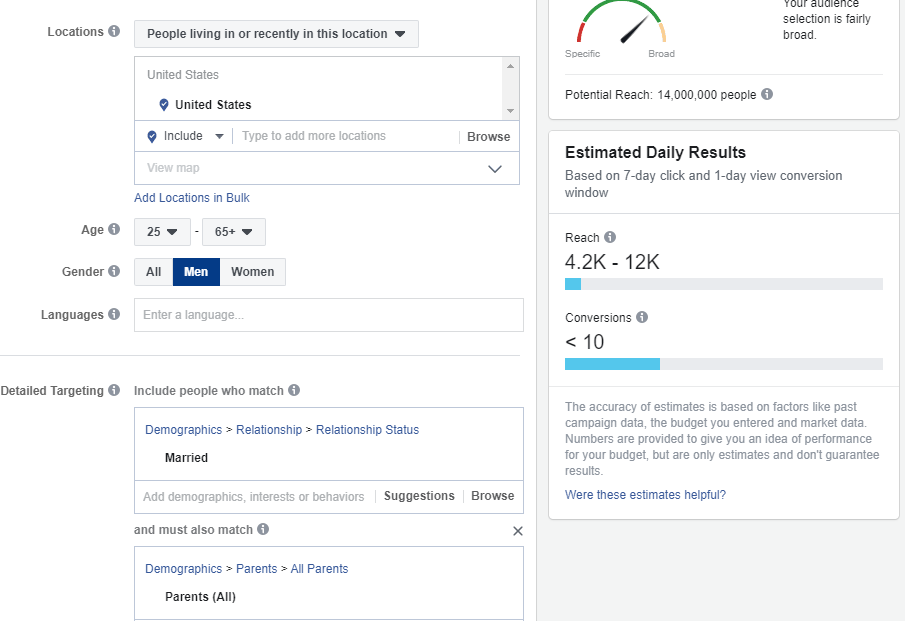
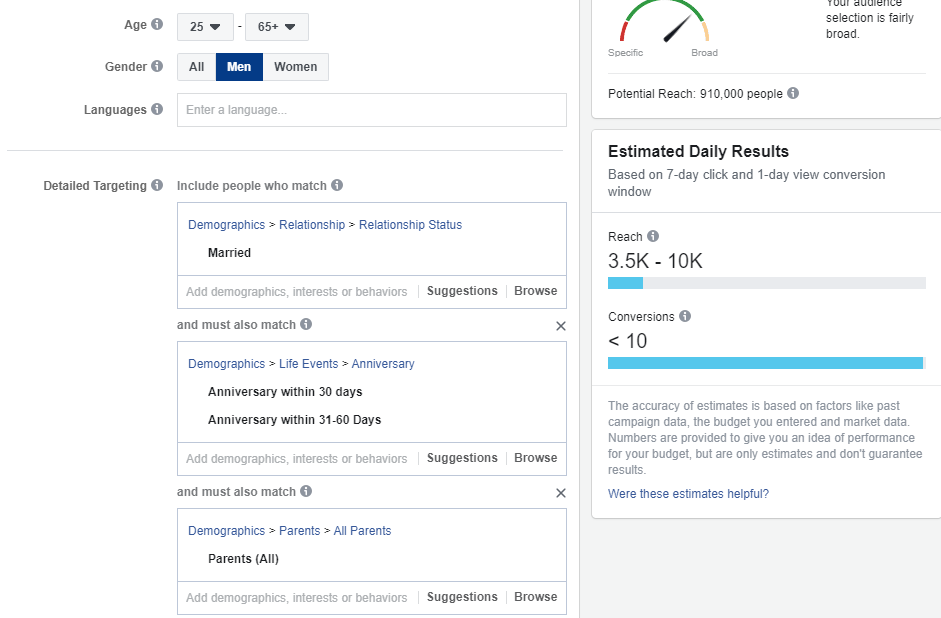
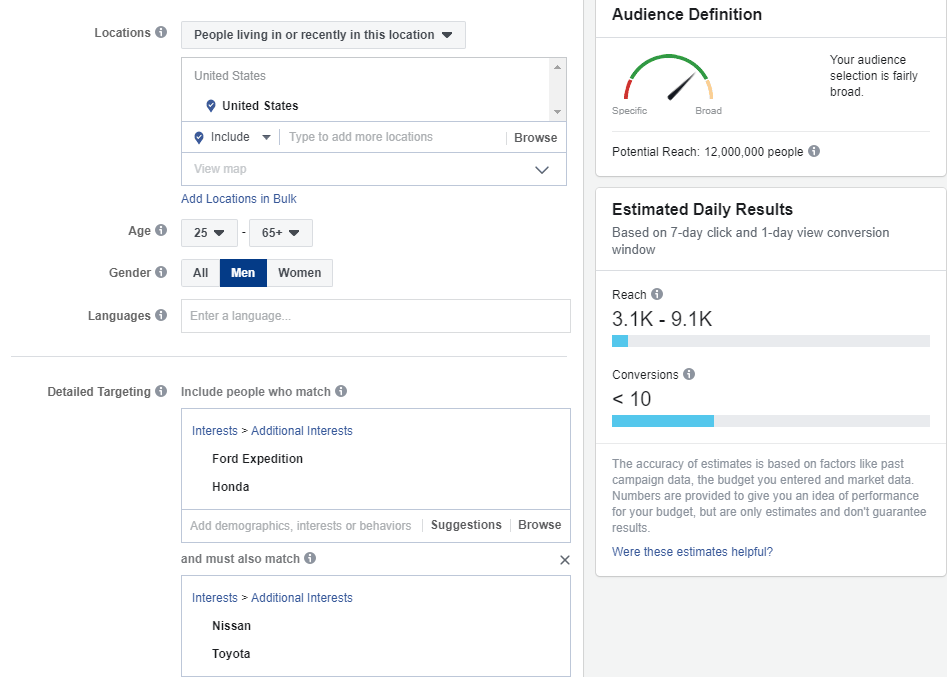
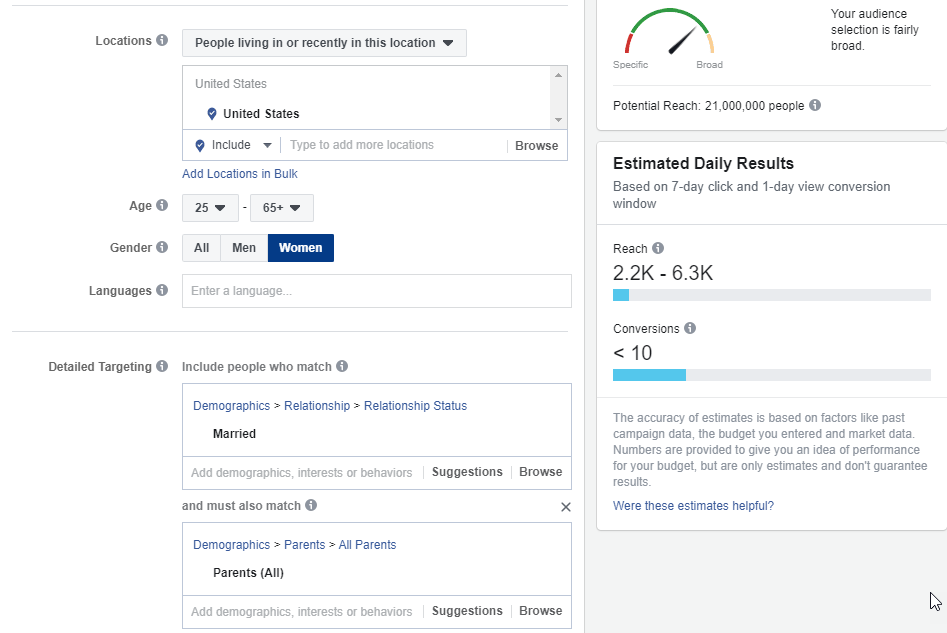
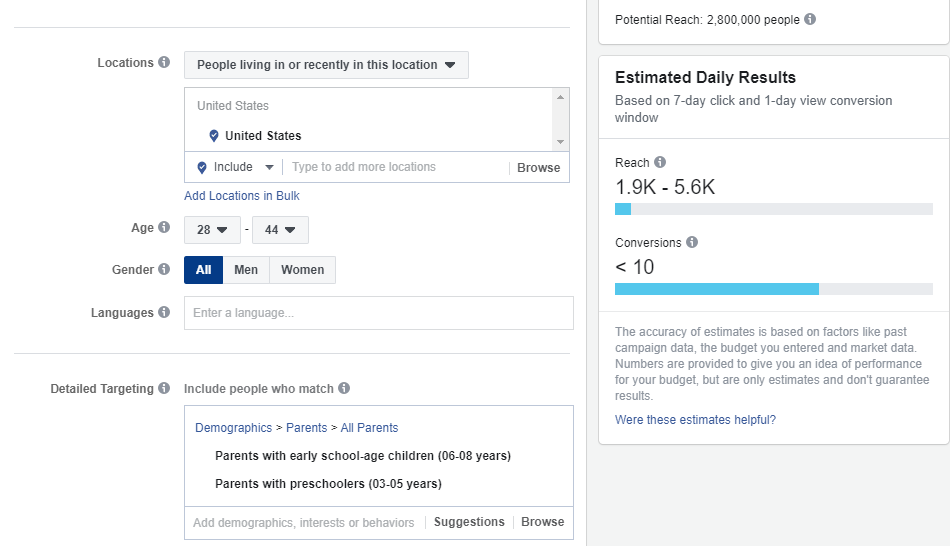
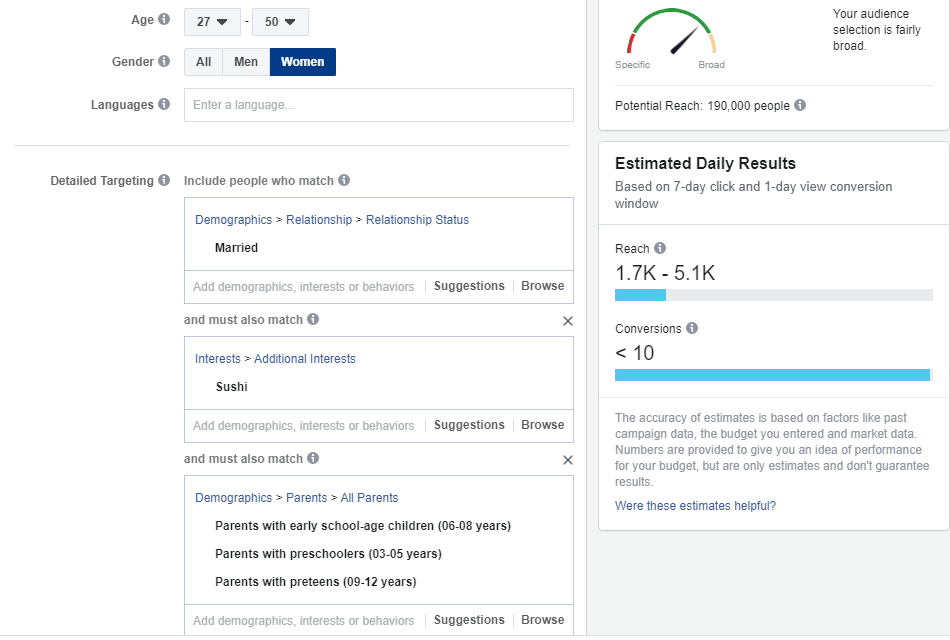
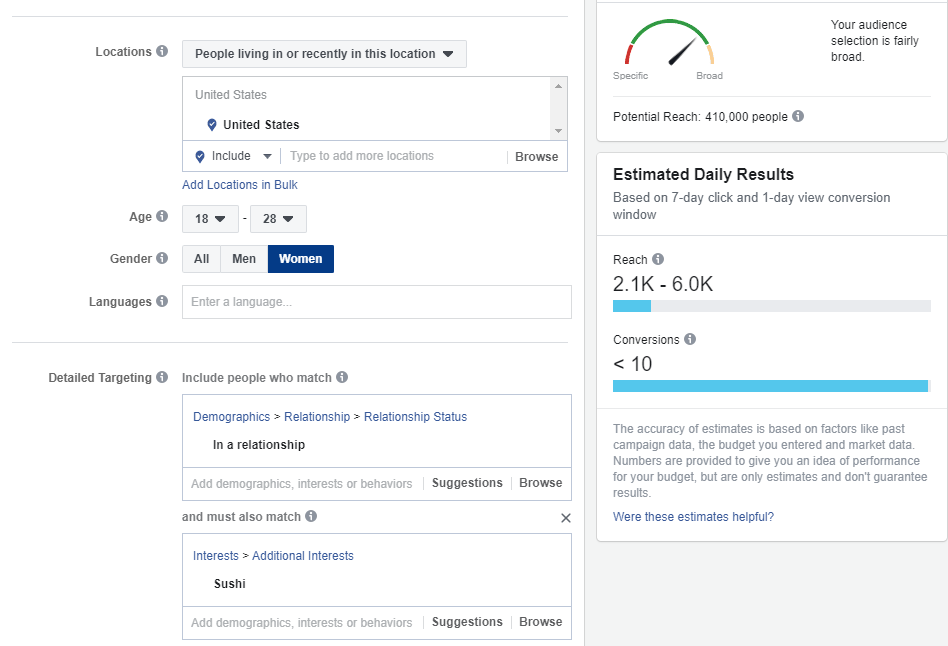
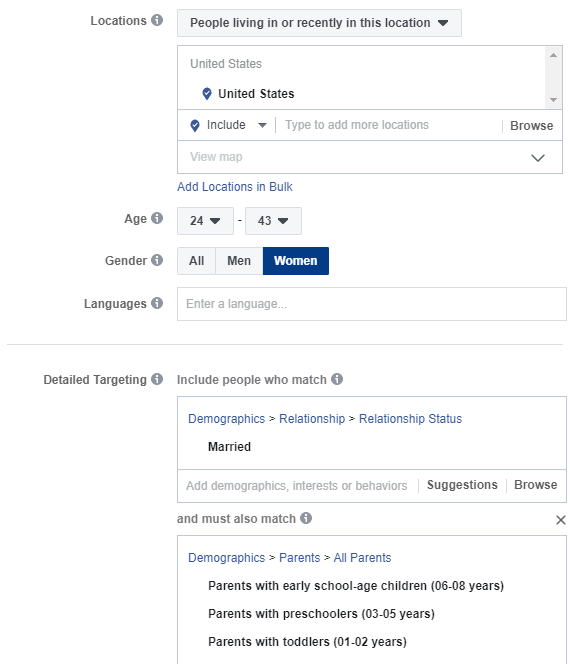
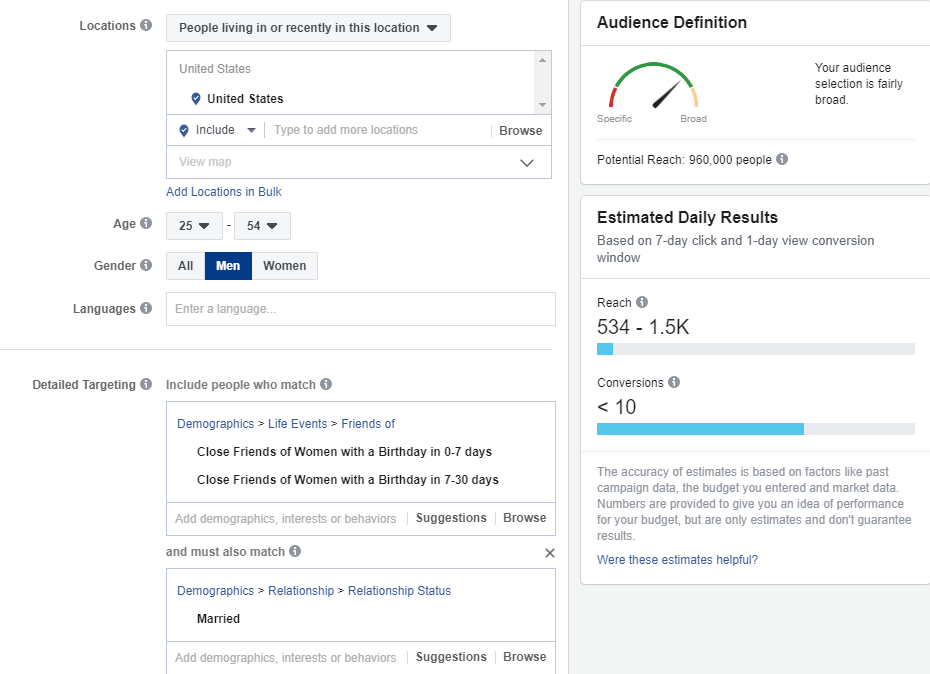
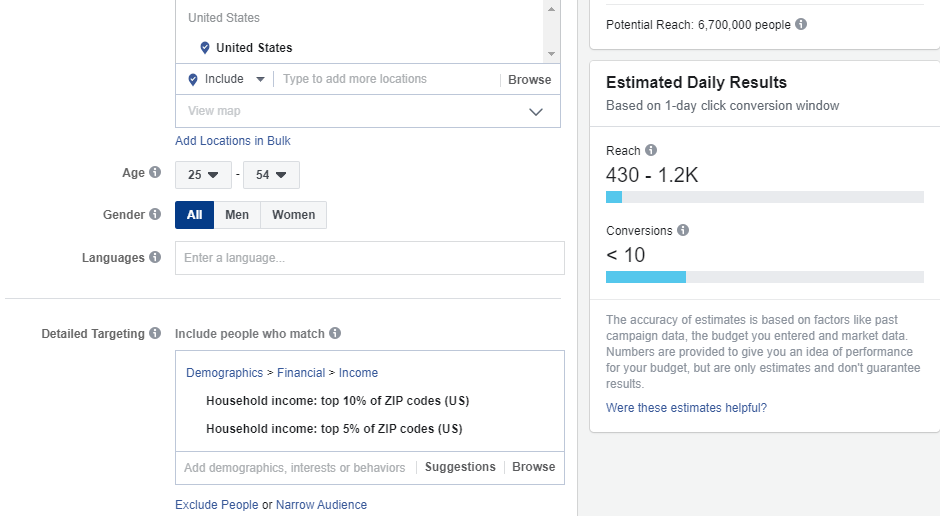
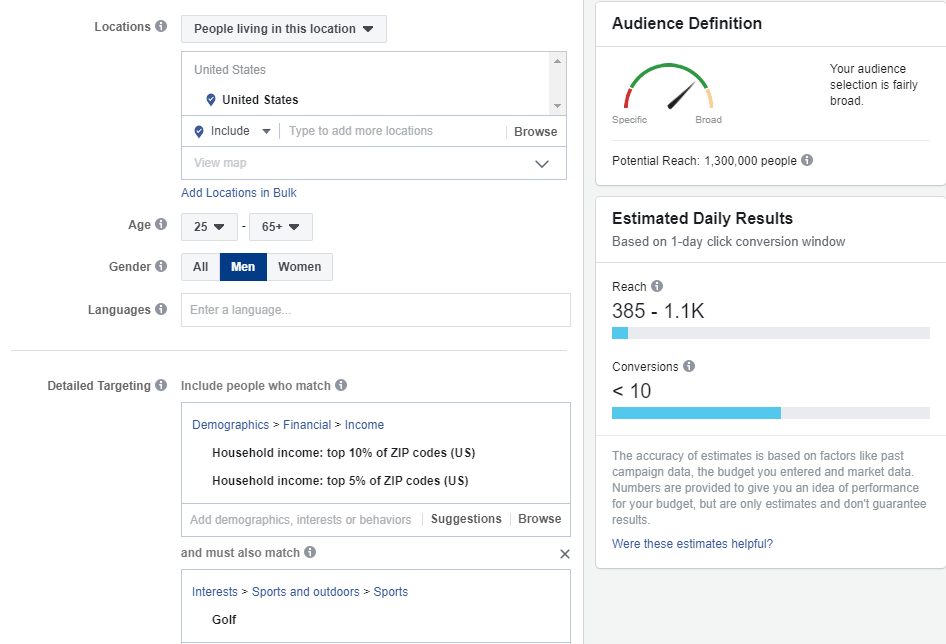
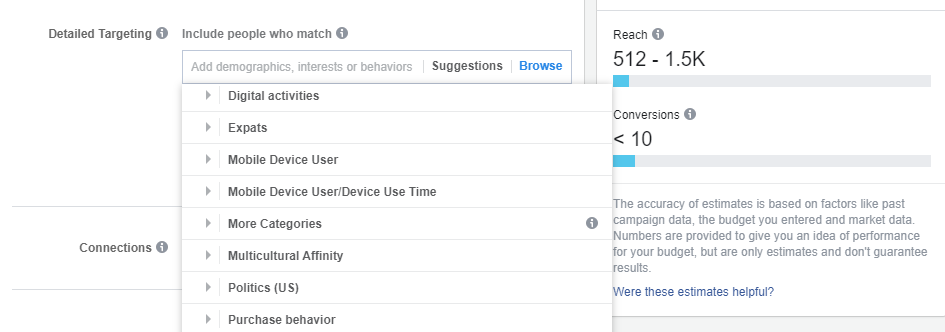
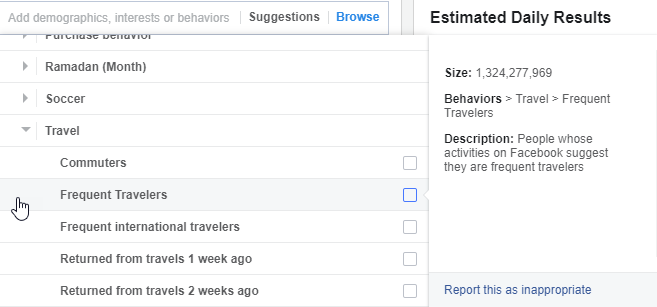
6. Change your targeting – Test different audiences and see if you can hit an audience that will keep bringing you sales. Try a much bigger audience, try a small audience, change something in your targeting, do something to refresh the audience for Facebook and get your product selling again.
7. Try a different event optimization – Sometimes Purchase optimization doesn’t work as good as Add to Cart optimization. Each ad account acts differently so there’s a chance the ATC optimization will bring much better results than Purchase.
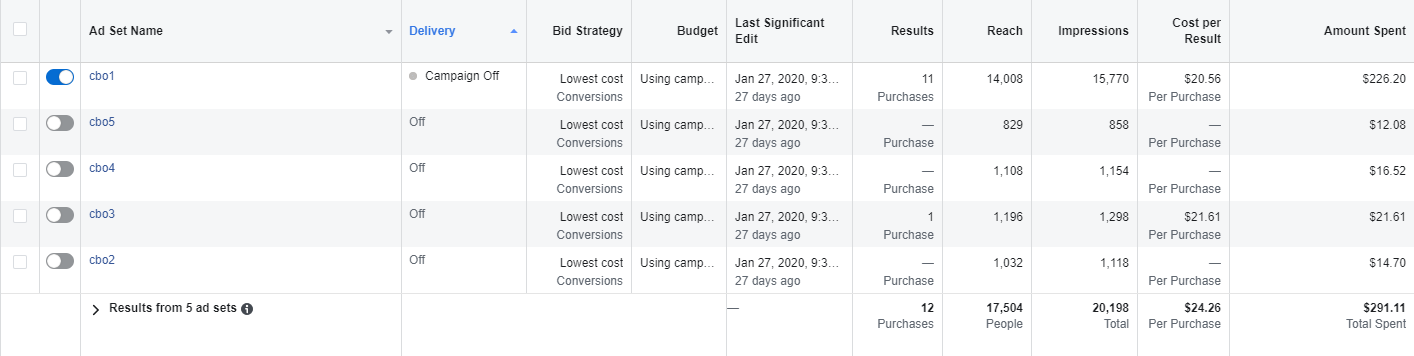
I have an ad account that for 2 years in a row was using only ATC optimization and brought me amazing sales. But since February this year, it only uses purchase optimization because I decided to try CBO campaigns optimized for purchase. So I went from Purchase to ATC and back to Purchase optimization again.
And of course don’t forget to tweak your ad copy, make your store link visible on the description and use a good call-to-action text.
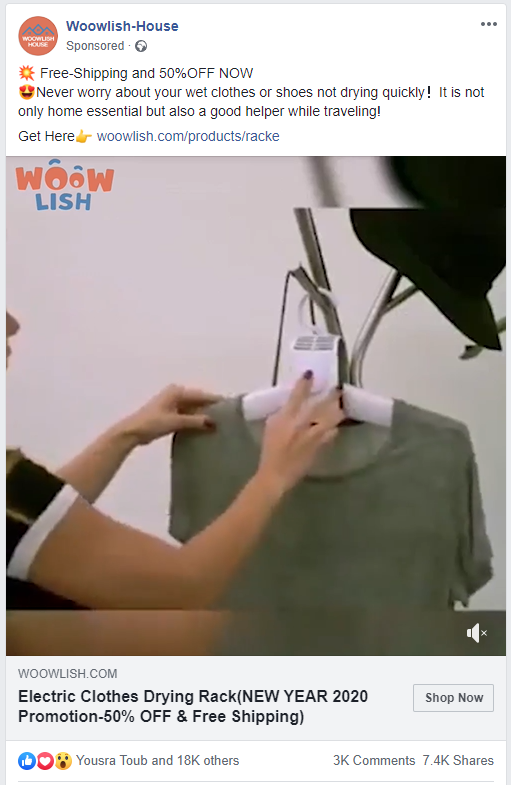
BONUS
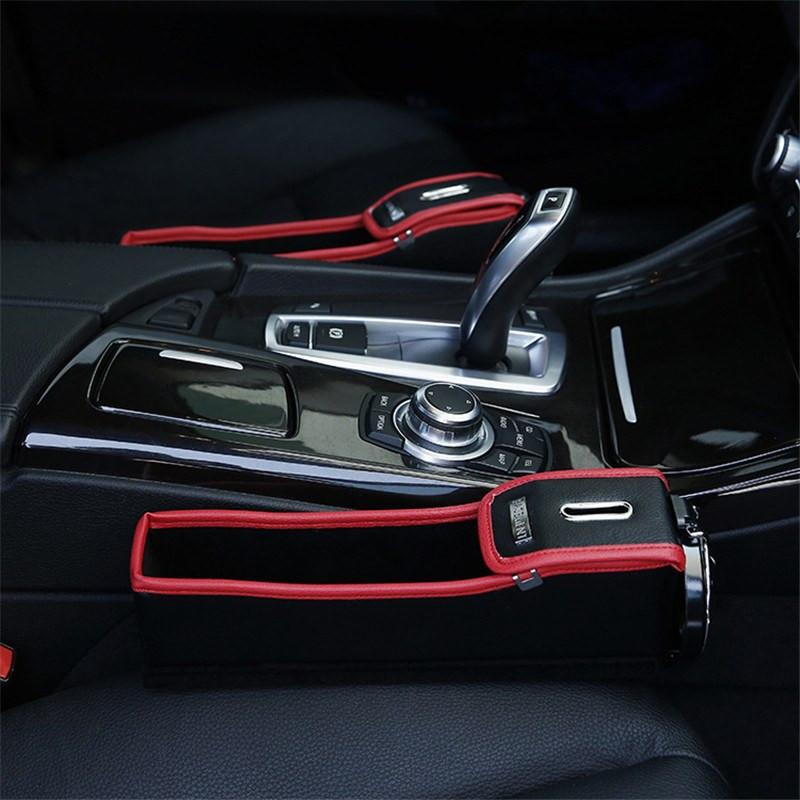
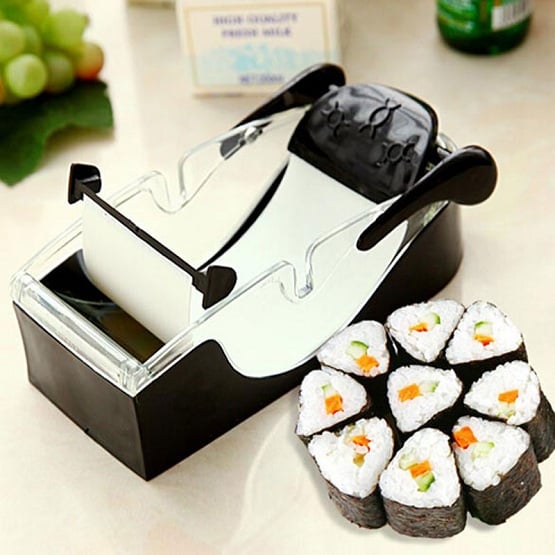
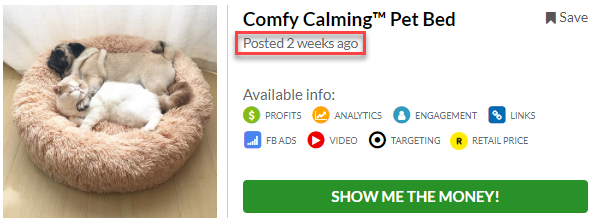
If you’re following our Youtube channel, and you definitely should, you would recognize this product from the winning product drill-down video Serban made. If you haven’t watched this product drill-down video, you can watch it here => https://www.youtube.com/watch?v=nXHX4DKmHK0
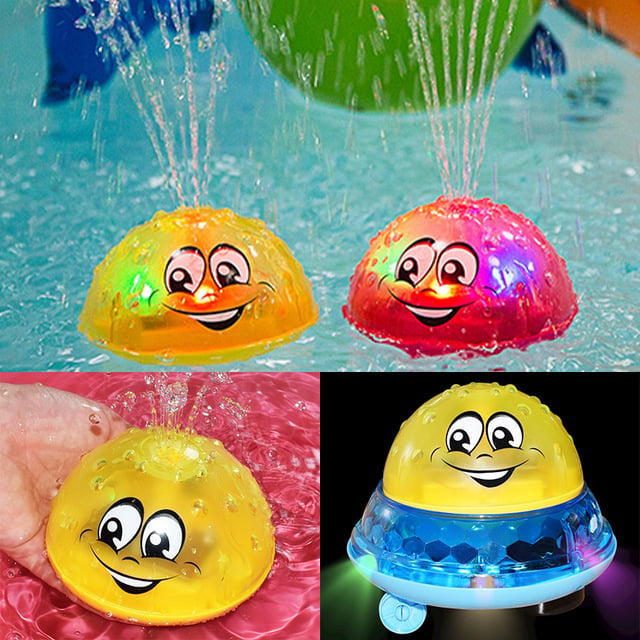
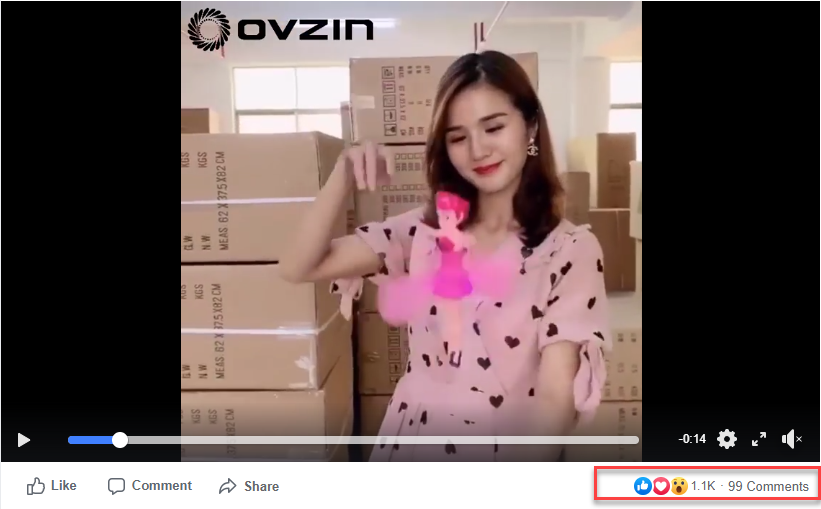
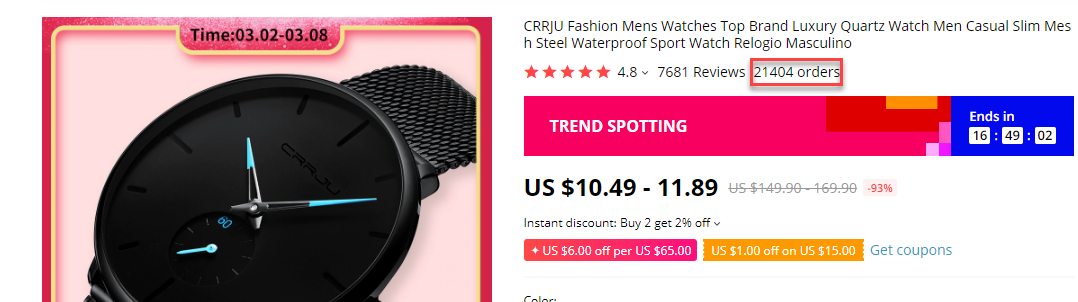
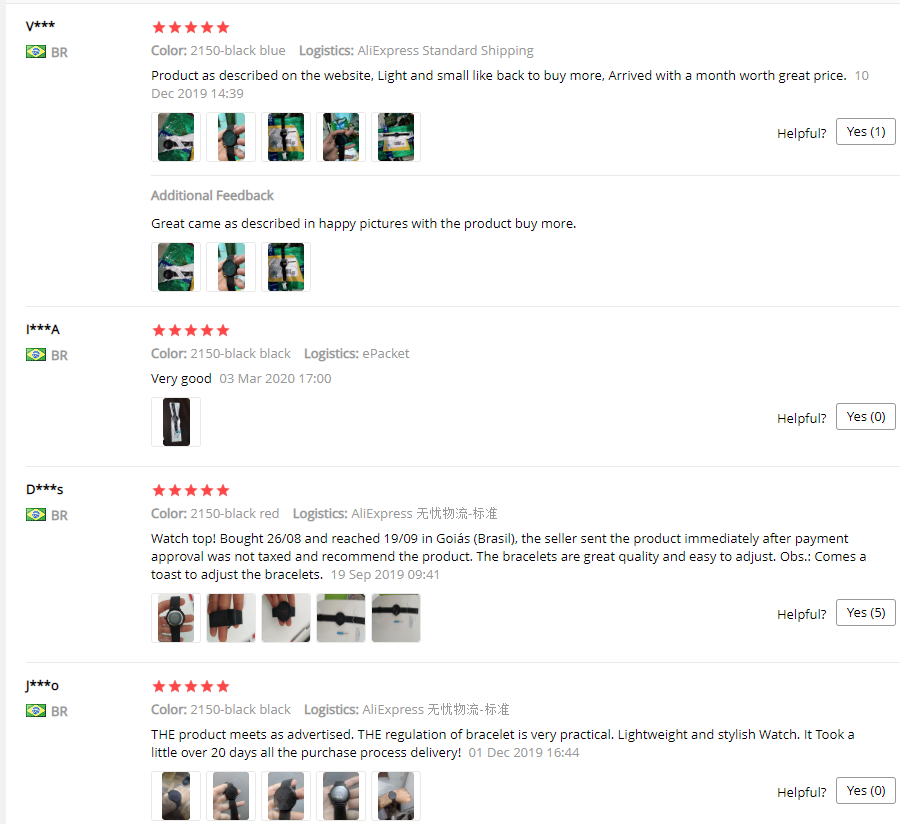
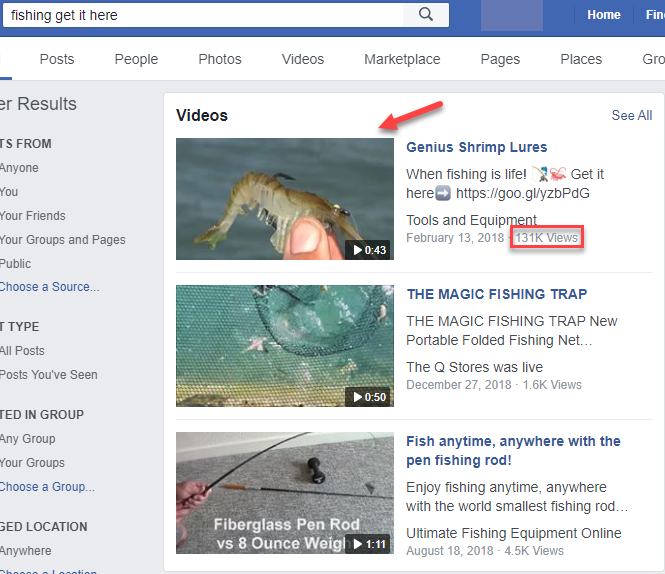
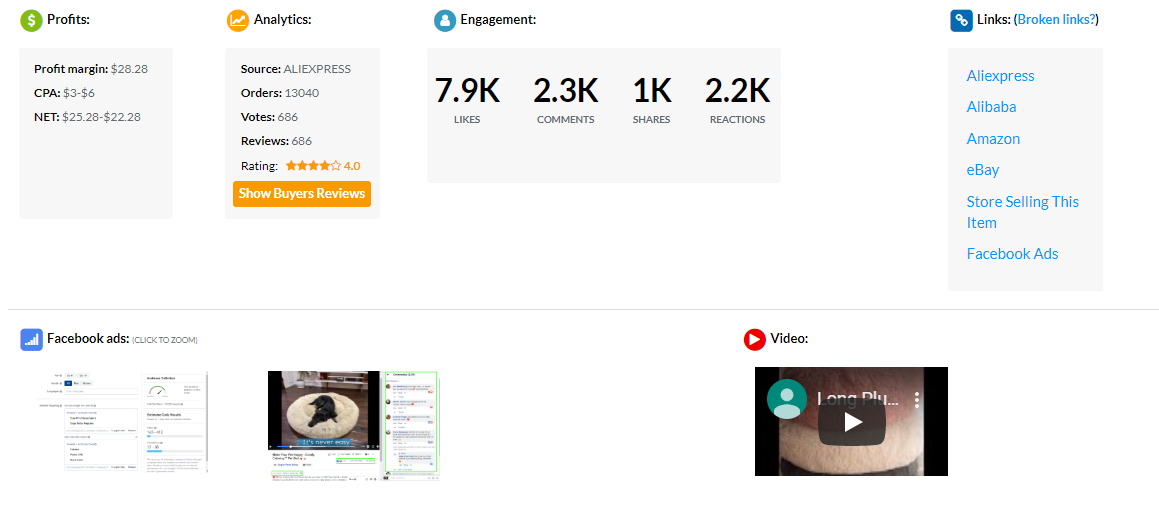
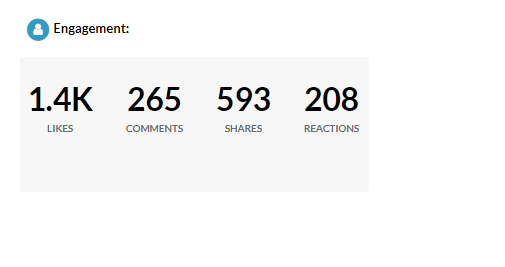
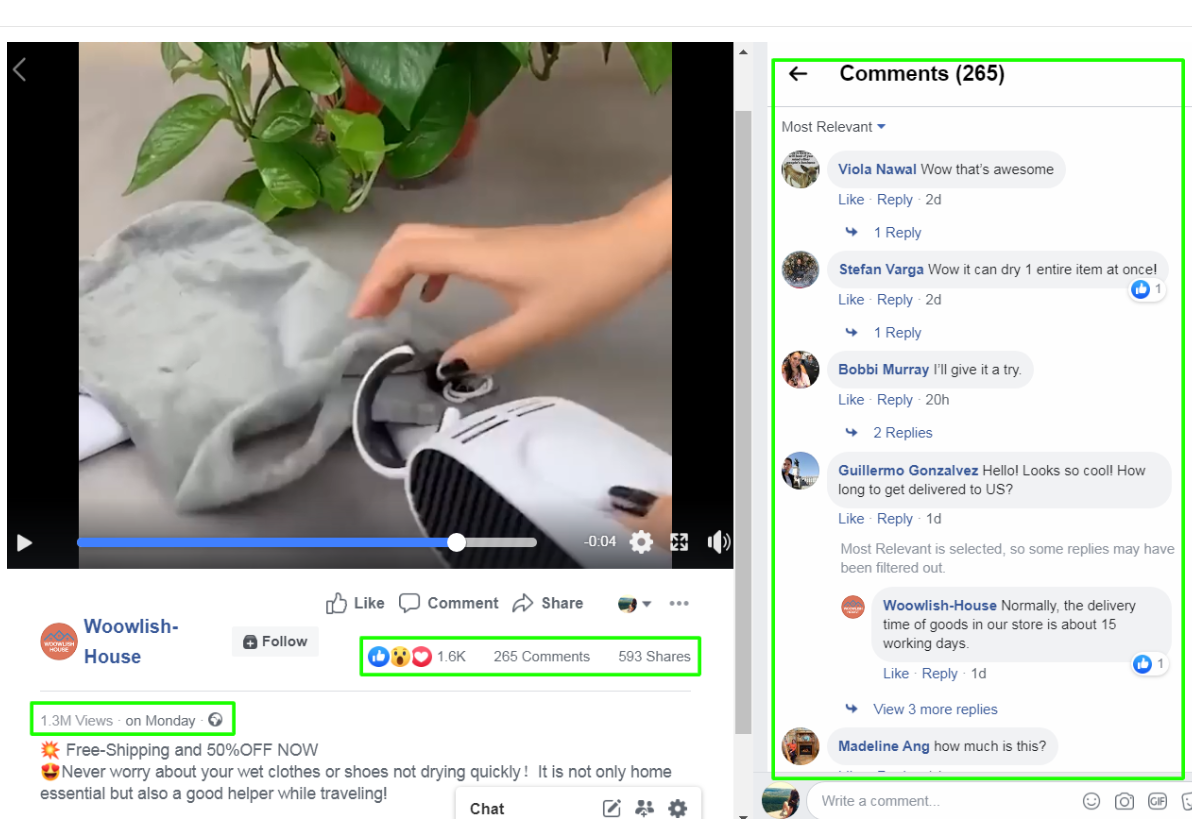
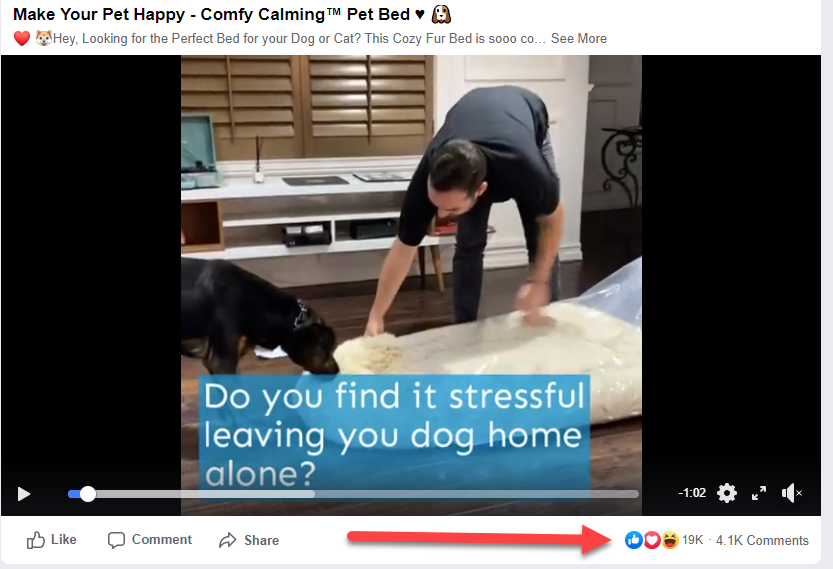
The original ad for this product had almost 20k Likes, almost 4.2k comments, and it’s definitely a 6-figure product that made A LOT of money to the dropshipper selling it.
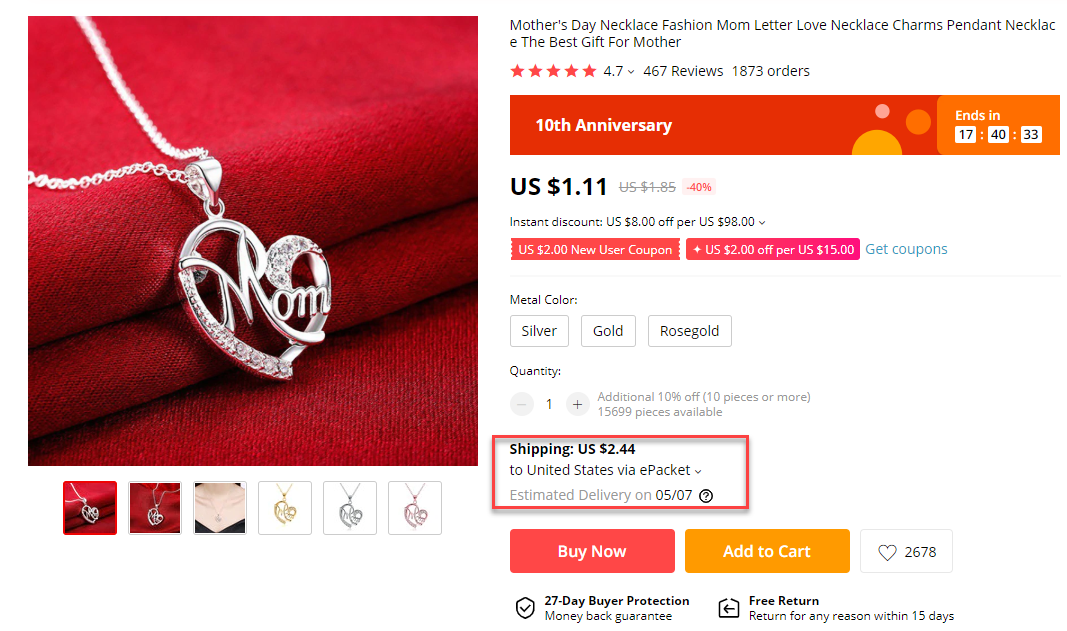
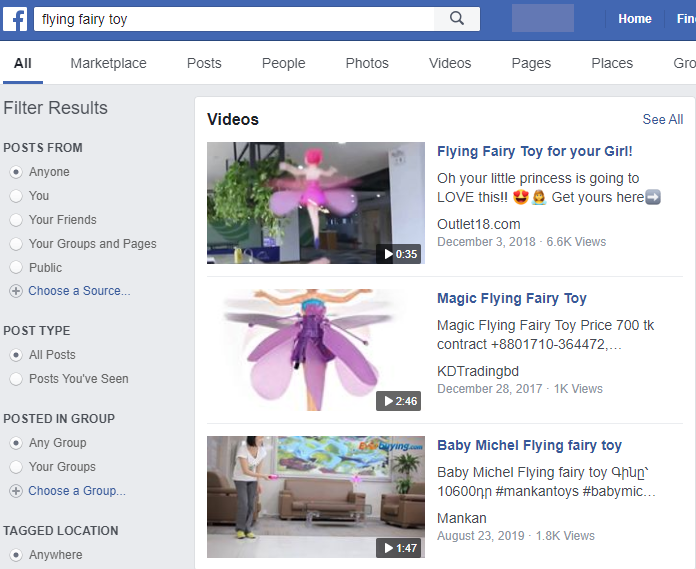
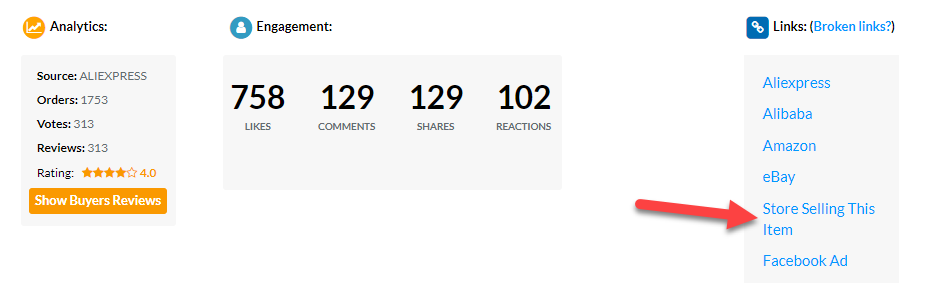
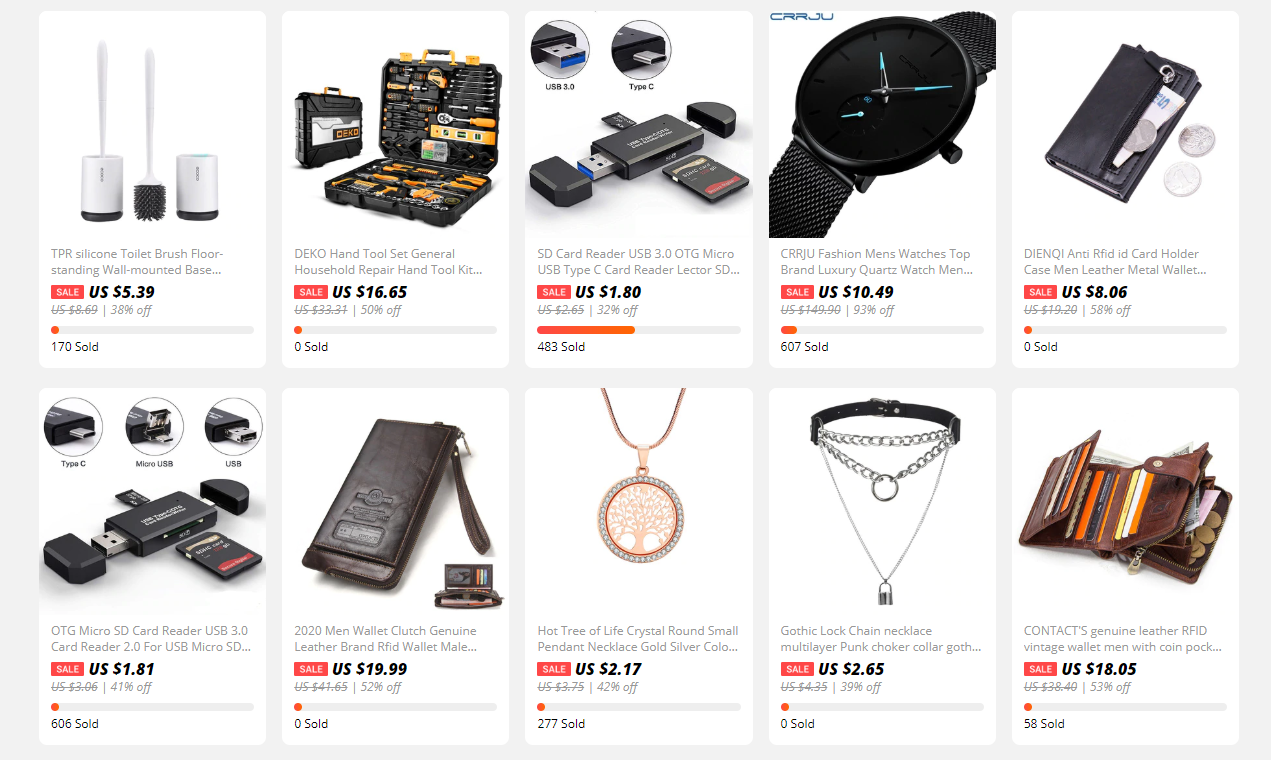
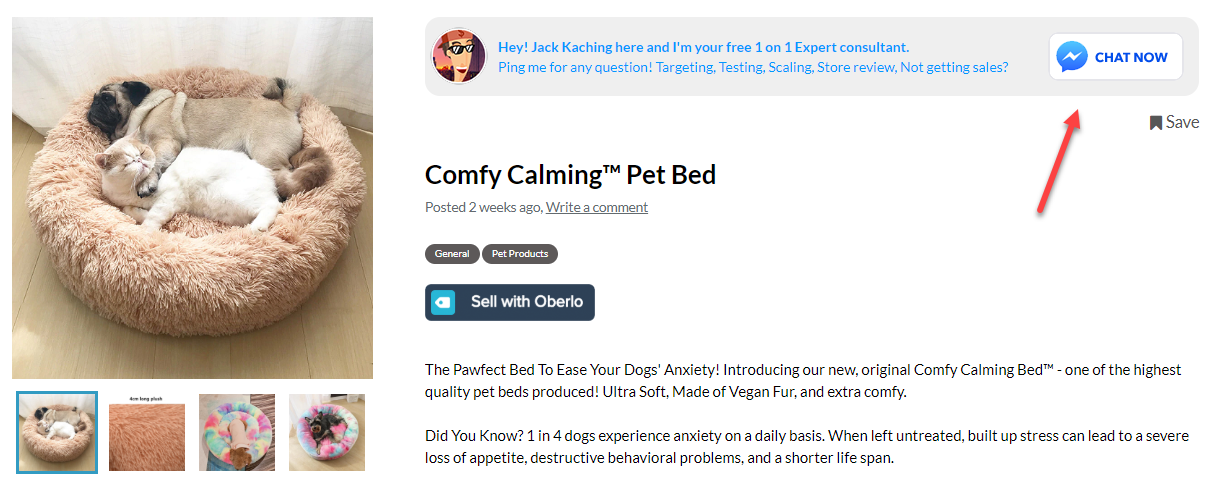
You can find this product on Ecomhunt with the original Facebook ad here.
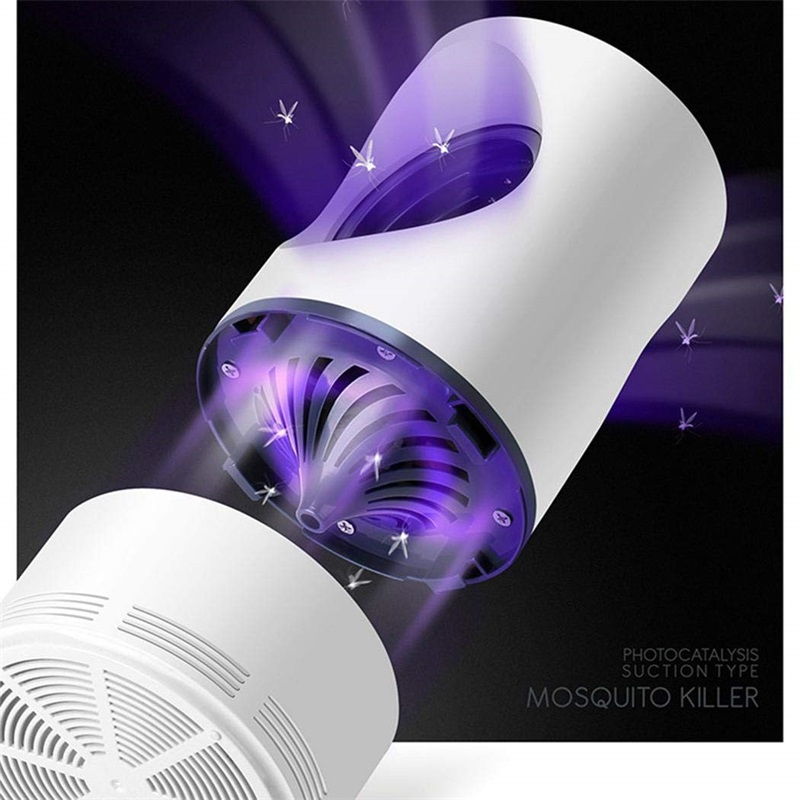
Now this product was on Ecomhunt when it only had 7k likes and that’s nothing compared to what it had by the end. And Serban told you again and again that there’s still more money to be made by selling this product.
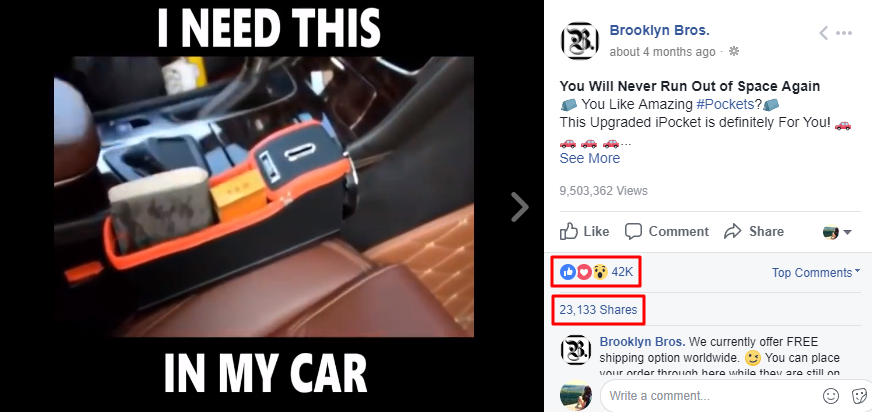
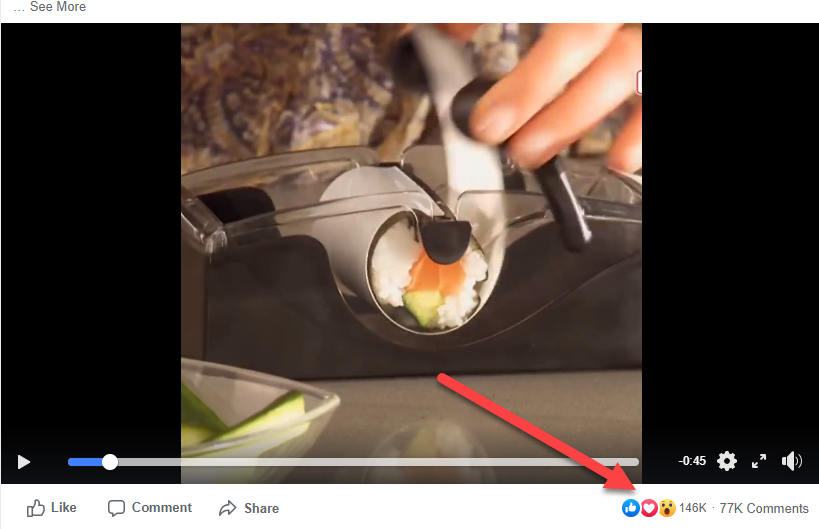
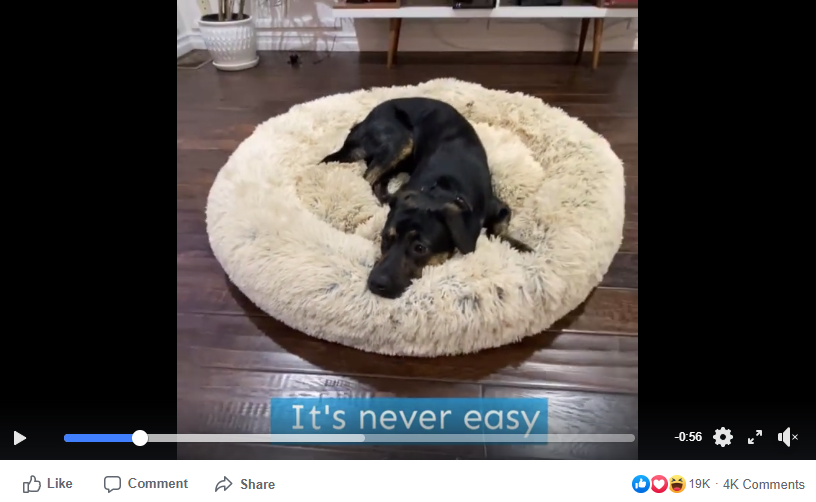
And today I was scrolling and look what I found:
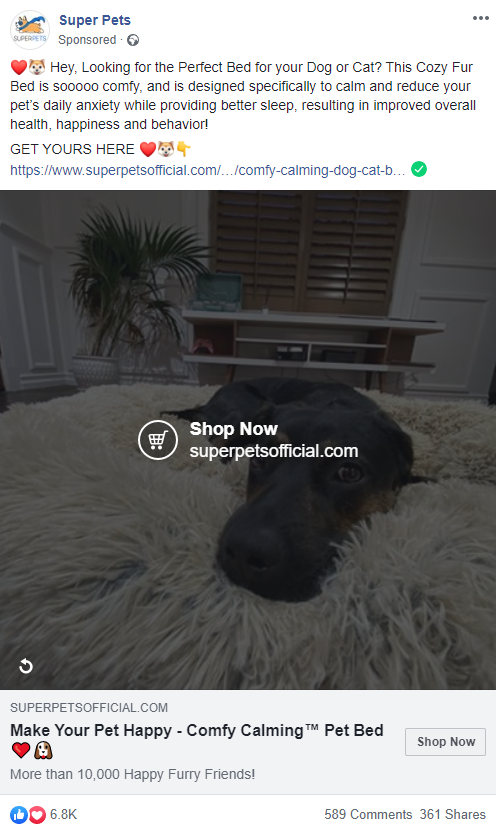
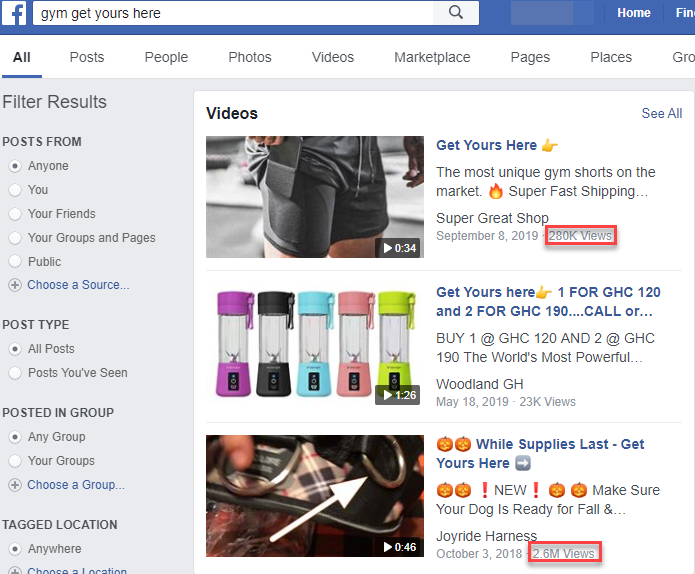
The same product advertised again on Facebook with some REALLY good engagement and views. They’re running their ads Worldwide and they started advertising this product again on March 28th. This is only 10 days ago!!
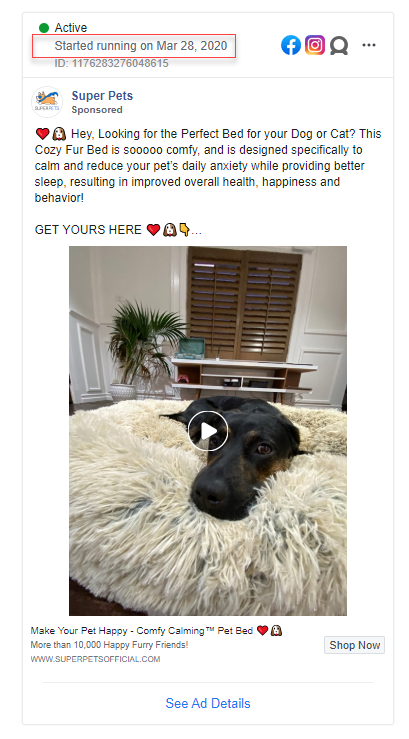
I really hope it’s one of you guys, our dear Ecomhunt users! And if not, I will say it again that this product has a lot of potential so just jump in and try to sell it.
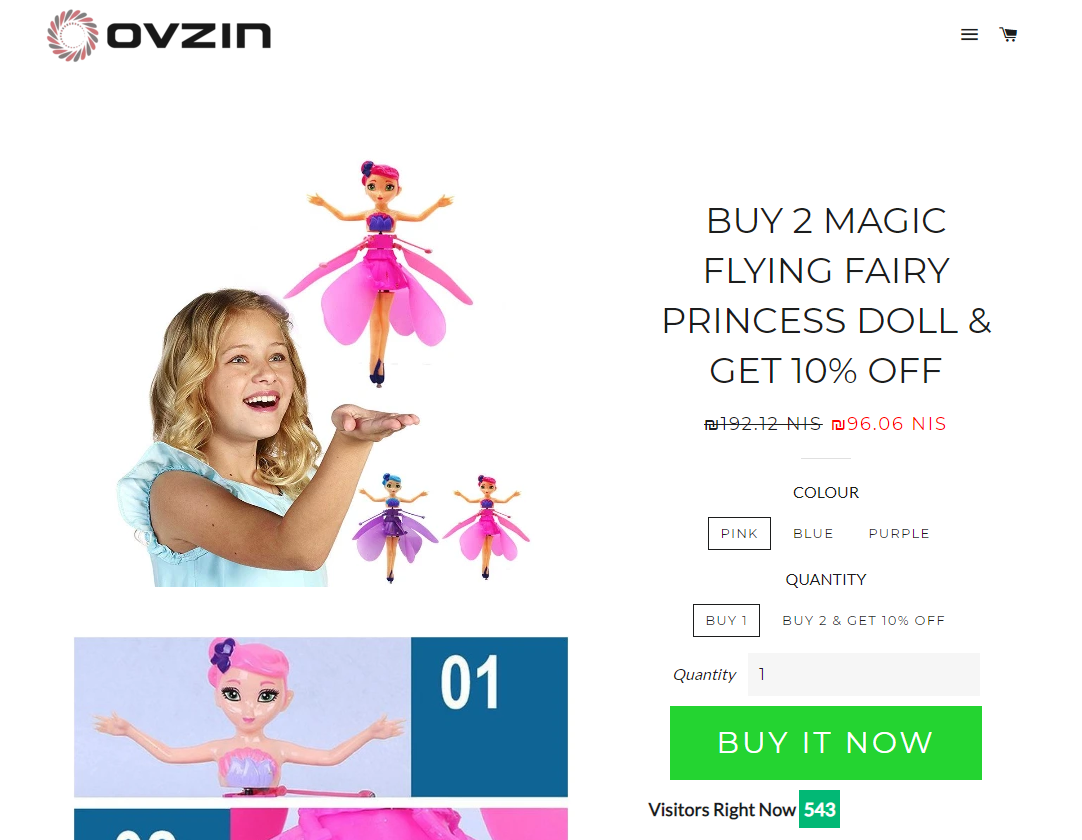
How can you jump in and sell this product too?
My advice is to read my product drill-down article for a different product I found on Facebook that’s doing great. In this article, I basically do the same thing as Serban did in his video, maybe with a bit more detail to stuff.
And at the end, I give some tips on how you can sell it again – Use the tips there for this Calming Pet Bed product.
Good Luck!
To Sum It Up:
It’s not like 2-3 years ago, when you just launch ads on Facebook and get stable sales. Nowadays it’s different and requires more time, tweaks and a lot of thinking… But still, Facebook is the King when it comes to ad performance and if you follow the tips in this article, your campaigns will do much better!
Good luck and stay safe!
Struggling to find good products to sell? Not sure who’s your target audience? Tired of losing money on products you were sure were “winners”?
Then Ecomhunt is what you need! Find hot winning products that are added daily, spy on their ads & stores and import them into your store in 1 click and Start Selling Today!