")


Welcome to the first part of our Free Dropshipping Course and in this part I will show you how to build your first successful Shopify store.
In this article, I’ll guide you through the most important steps of creating a Shopify store like Payment providers, prefernces, important settings, shipping, Shopify apps and much more. By the end of this article, you’ll know exactly how to create the perfect Shopify store.
The next parts will be about picking winning products and how to find competitor ads and stores.

1. Configuring Your Shopify Payment Providers
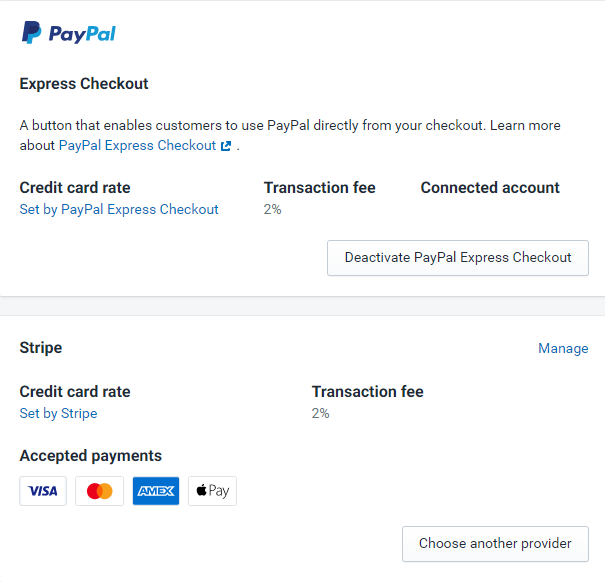
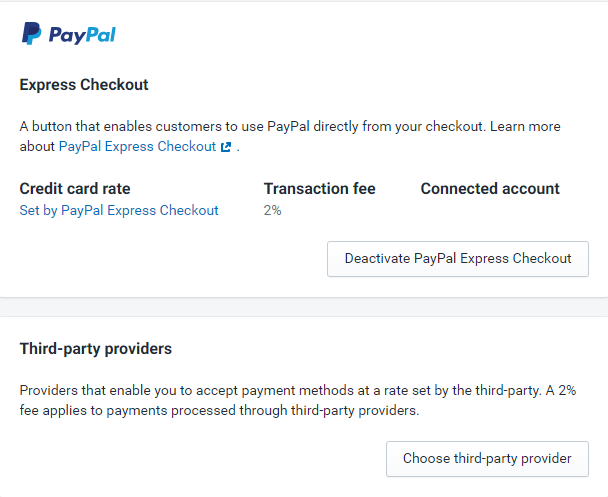
Before building your dream store, you need to first configure your payment providers. If you can’t accept payments through popular gateways like PayPal or Stripe, then you simply can’t sell online… You will need to find a solution and a way to accept payments online.
Of course there are other available payment gateways – There’s a Cash on Delivery(COD) option and local payment option, just make sure you have a way to accept payments before getting into this.
The most popular ones are of course PayPal and Stripe and if you have both of these, you’re basically covered. If you have only one option available, PayPal or Stripe, then it’s fine too. Your conversion rate may be a bit lower and you can miss some sales but it’s nothing big really.
We had scaled stores in the past with PayPal or Stripe only with no issues at all and had great results!
Pro tip: If your only option to accept payments is PayPal, make sure to let people know they can checkout as a guest with their credit cards without creating a PayPal account. You can let them know this on your product page and your checkout pages. This will lift a bit your conversion rate and help you get sales from people with no PayPal.
2. Shopify Themes
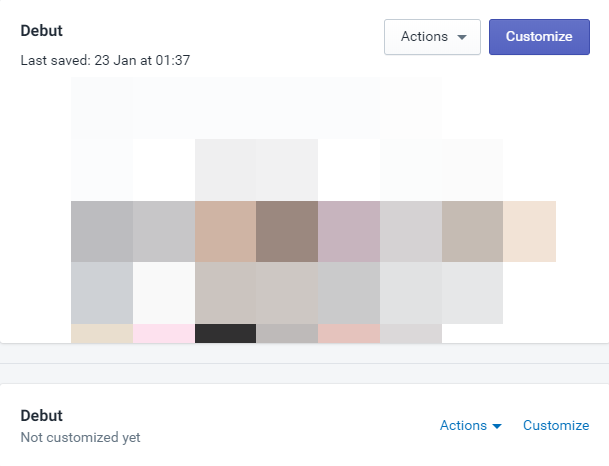
If you’re only starting out, you have absolutely no reason to install a premium theme. Every store we ever tested and scaled, had no premium themes and we only used the free ones. Trust me that a premium theme is not the thing that’s going to keep your customers from buying.
So instead of spending $180 on a premium theme, invest it on ads or other stuff which can contribute more to your success. Remember that premium themes always look better on desktop but when it comes to mobile, it’s almost identical.
Take Kylie Cosmetics Shopify store for example: On desktop it looks amazing and I really can’t replicate the same look by using Shopify’s free Debut theme. But I can get almost the same look on mobile with only 1 or 2 features missing.
And when most traffic comes from mobile, I will focus first on the mobile look so the Debut theme is more than enough.
After picking up your theme, you will need to add a logo, some banners and customize stuff like colors, fonts, buttons, etc. My advice is to always check the big stores first and to simply take inspiration from what they do.
Don’t try re-inventing the wheel – If a 6-Figure a month store is using a Green button color, then do the same. If a 6-Figure store is transferring the customers straight to cart page after click the Add to Cart button, then do the same.
It’s something we do with all our stores and it’s to transfer people straight to the cart page so they can proceed with their checkout. We’re not Amazon and people are not going to browse our store and add 10 items to their cart and then checkout… We first focus on getting a sale because it’s much easier to convert an existing customer again than getting a new customer.
To transfer people straight to cart after clicking the Add to Cart button, you need to un-check the “cart notification” in the Debut theme.
Click Customize on your theme and go to Theme Setting, then click on the Add to cart notification.
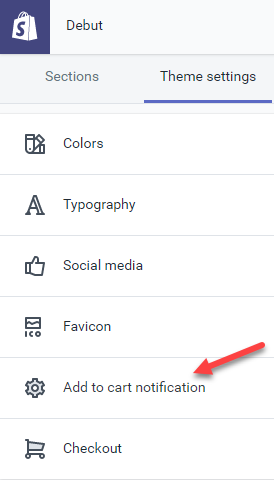
After clicking on it, un-check it and click save.
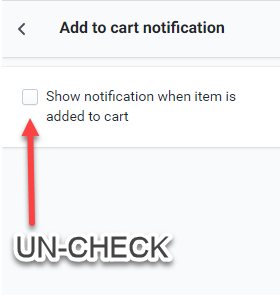
That’s it. If the notification is on, your customers will see a notification that their product was added to the cart. They will have to manually click on the cart icon to go to their cart and checkout.
Pro tip: If you’re not a designer and need to pay for a logo and some graphics, then please don’t invest too much into it… A solid Logo doesn’t have to cost more than $50 and most of my logos were priced at $30. There are also online services that generate logos like Placeit and they’re doing a pretty good job.
Same goes for banners and other stuff – Don’t invest too much… A $200 Logo with some amazing $300 banners won’t matter if your product or ads suck. $100 or even less for a Logo + some banners is the maximum you should spend. I usually pay $30 for a logo and use some of the free pics for my banners.
3. Shopify Apps
I wish Shopify monthly plan + commissions were enough to cover everything we wanted, but unfortunately this isn’t the case.
The bad news: A Shopify store simply can’t operate without apps and this means more money each month goes to operate our store.
The good news: The apps we’re going to use are either free or they will pay for themselves and boost our sales after only a few days 🙂
Shopify apps are here to help us get more sales, upgrade our store, add customizations, and more. It’s a no-brainer to install an app to boost our sales or install an app to recover lost sales. We just need to know what apps to install and when to install them.
If we just install all the sale boost apps when we don’t have any traffic, it will not help us at all and we’ll just lose money.
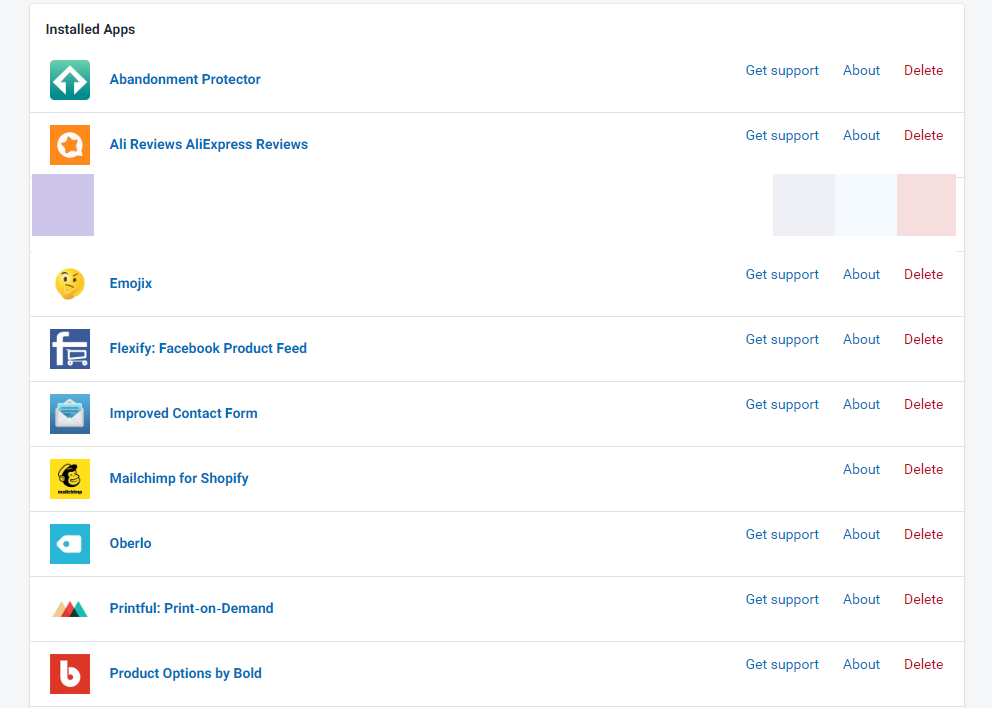
Start with a few apps and add more only and when you see some results – With that said, here are the apps we recommend to install:
- Oberlo – To quickly import products from aliexpress and to later fulfill them. A huge time saver and a must app to have.
- Ali Reviews – Import aliexpress reviews to your product page. Having reviews on your product page will increase your conversion rate.
- Emojix – An exit popup app that does a great job at grabbing your customer’s attention just before he leaves your store. Traffic isn’t cheap so we must do all to try and keep them on our store and eventually purchase from us.
- Abandonment Protector – Email marketing and Email Recovery emails done for you. Create abandonment emails to be sent to the customers who left checkout without ordering.
- Ultimate Sales Boost – A sales booster app with plenty of features like timers, stock counters, and much more. The free version has a lot of free options and you won’t need more than that to get started.
As you can see, some of the apps have a good free version you can use without upgrading to the premium one. Some apps are pretty cheap and come with a generous free trial you can cancel anytime. If you’re just starting out, these apps are enough and won’t cost you too much.
4. Shipping
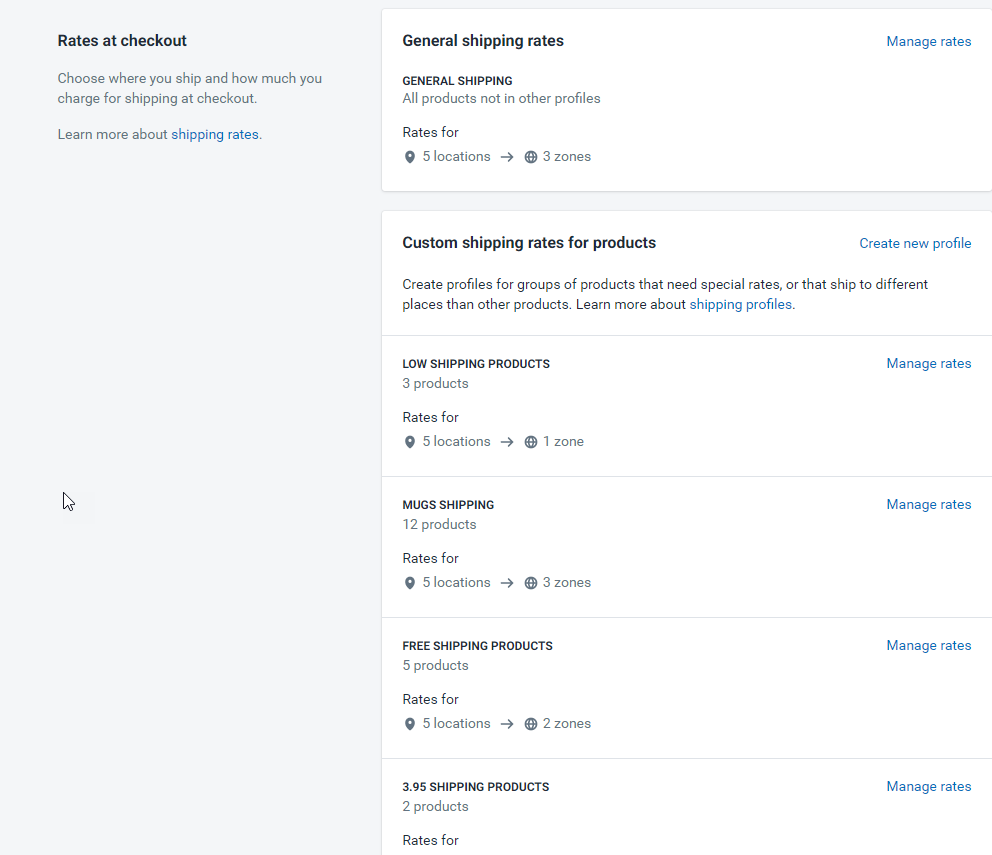
Shopify has now shipping profiles and it gives us an easy way to setup our shipping costs. Before the profiles, you had to play with the product’s price or weight to setup shipping prices for different products or use a paid app. But now it’s much easier.
With shipping profiles, you can setup a General Shipping rate for all your store and then setup profiles for a single or a group of products.
For example:
You can setup Free Shipping for all the products in your store and if suddenly you have a product that you want to charge shipping for, you can create a profile just for it.
Take for example the shipping profiles from one of my stores:
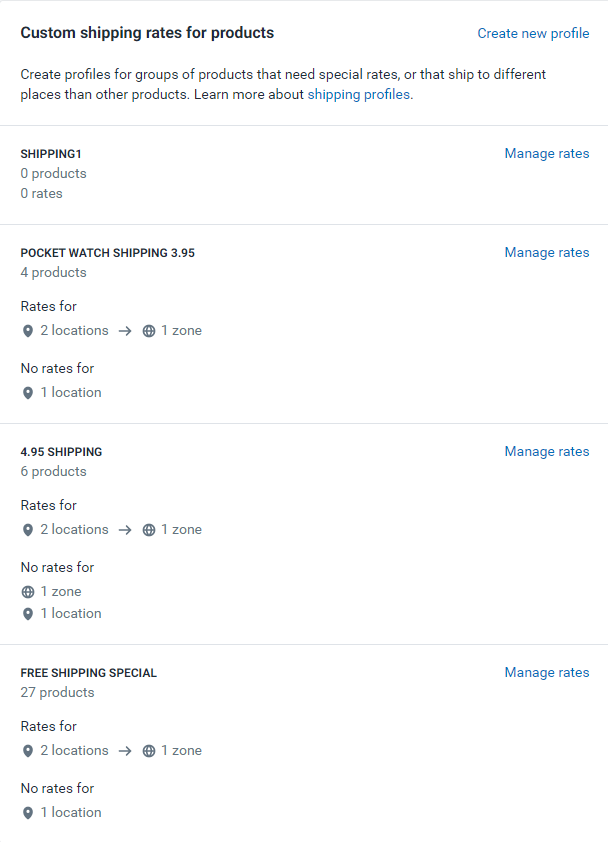
I have a shipping rate just for a Pocket Watch product from my store which is $3.95. There, I have also setup that when two are ordered, the shipping is free. I have a shipping rate of $4.95 and there I have 6 products. When a new product is added and I want it with a $4.95 shipping, I just add it to this profile.
And I have a FREE SHIPPING SPECIAL profile where I drop my free shipping products. This way if a product comes in and I don’t want to charge shipping for it, I just throw it inside this profile and I know it will have now $0 shipping.
Shipping profiles are an easy way to setup and control our shipping costs and you don’t need any paid app to do it for you.
5. Domain Name
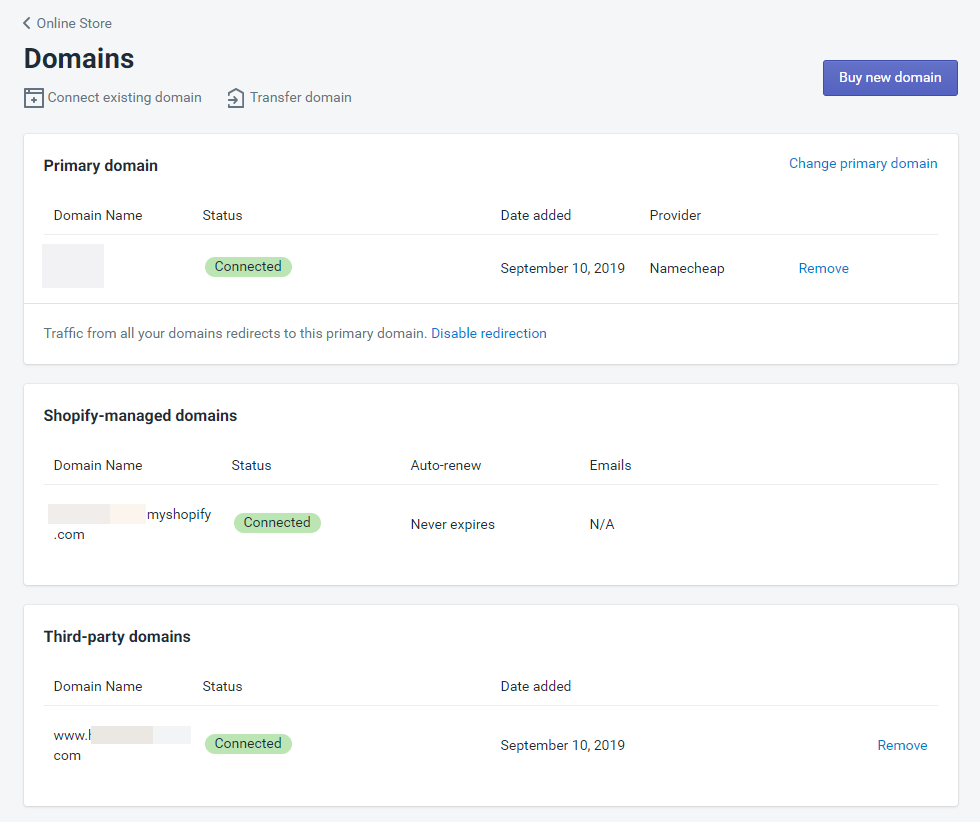
I always recommend picking a .com domain name before any .co, .shop, .net domains. The .com Domain is still the King and my advice is to spend extra time before you jump and buy the less attractive ones.
I’m not saying .shop or .co domains are bad… There are plenty of stores that do super well with these domains, it’s just that some people consider these as “spam” or “scam” domains so I prefer getting only .com domains.
The second thing I always say is to NEVER buy a domain from Shopify. I know it makes the connection process much easier and you don’t have to play with your DNS addresses or any of that stuff… It’s just that in the long run, it’s better to have your domains in one place, under one domain provider, to move things much faster. If you buy a domain name on Shopify and later want to sell it or transfer it, you will need to do it through Shopify and in my experience, it’s not that easy compared to Godaddy or Namecheap.
Pro tip: Buy your domains on Namecheap because they keep your information private for free(Godaddy charges $10 extra for the same service) and give you a free 2 months trial for email hosting. All my domains are on Namecheap and in my opinion, they’re the best when it comes to domain hosting.
6. Preferences
![]()
In the preferences, you need to write your store’s Title, Meta description, add your Facebook pixel and your Google analytics tracking code. If you’re struggling a bit with the Title and description, please don’t run to Fiverr and pay $50 for someone to do it for you.
Find some successful stores and see how they did it. Trust me that it isn’t that hard and you should save this money for the important stuff.
What’s left is to add your Facebook pixel code and Google analytics if you use it – There’s no need in any manual code edits and Shopify will do it for you.
Pro tip: Install pixel helper Chrome extension to check of all the events are fired correctly. If you add a product to your cart, The pixel helper should show you the AddToCart event fired on the cart page.
![]()
Easy way to check if all events are fired correctly.
7. Pages
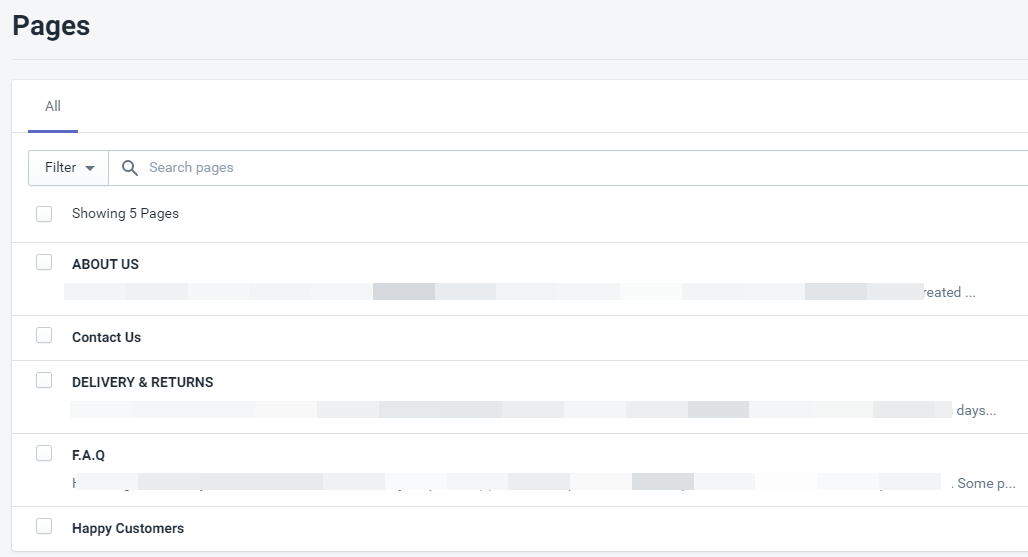
Your store needs to look professional and you can’t have that without important pages displayed.
Pages such as F.A.Q where your customers can look for answers to general questions(and save you from extra support emails!). Delivery&Returns to let them know your refund policies so if anything happens, you can always point them to this page.
About Us page is all about you and your store’s story. My advice is to make it personal and if possible, even post a photo of yourself. I saw a lot of small family brands where the owners post their pictures and it people can connect more to the store and feel safer buying from them.
*Of course, if you run a general dropshipping store, just write a nice story and it will be enough. Doesn’t have to be personal, just a few words about your “mission to bring amazing products for affordable prices” will be enough.*
Pro tip: Happy customers is a page I create with ali reviews app and it takes all the imported store reviews and puts them in one place. A great way to boost your store’s credibility and possibly increase your store’s conversion rate.
And of course, don’t forget to create a Contact Us page for your customers to contact you if they have any questions. You don’t need an app for that and it’s done automatically for you by creating a new page and selecting Template suffix ‘page.contact’.
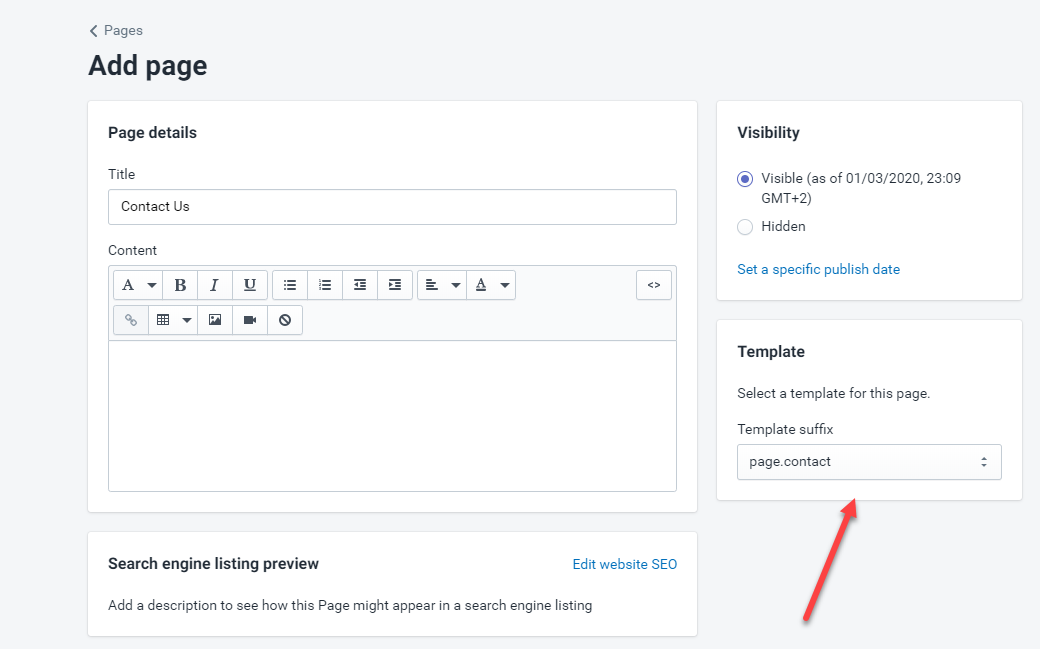
Give this page a Title and simple click on Save.
And don’t forget to add this page in the Main Menu or the Footer Menu in the Navigation tab.
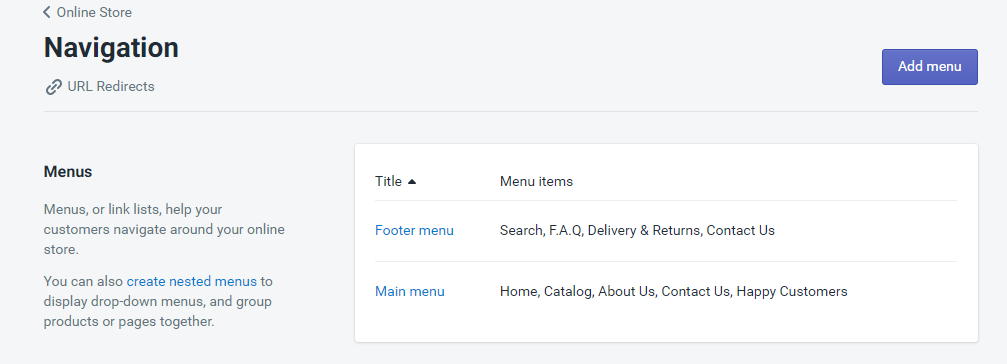
Click on one of the Menus and in there add a new menu title.

You have to Name it again and choose the page link. Click Add and you’re done!
8. Shopify Checkout Settings
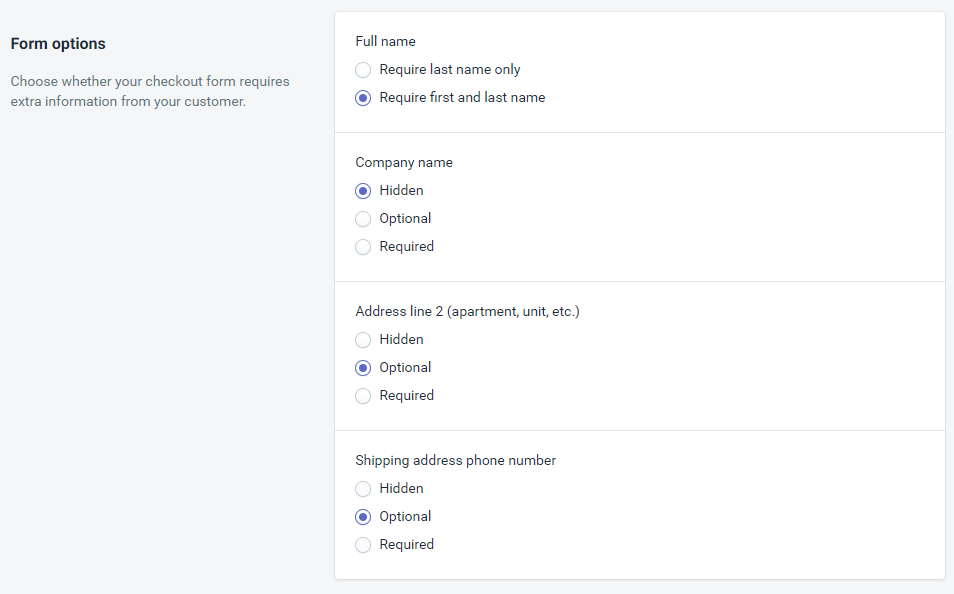
On all our Shopify stores, we setup Company name as optional and also the Phone number. The checkout process should be fast and easy for our customers to understand. This is why we hide the Company name because most of our customers won’t need need this field.
And we also make the phone number optional because some customer hate giving out their phones and this can lower our conversion rate. We make phone number a mandatory field only if we have plans for SMS marketing or if our credit card processors can’t process payments without a phone number(with Stripe, we don’t need a phone number).
Also make sure to have address autocompletion option on have the shipping address to appear as billing address by default.
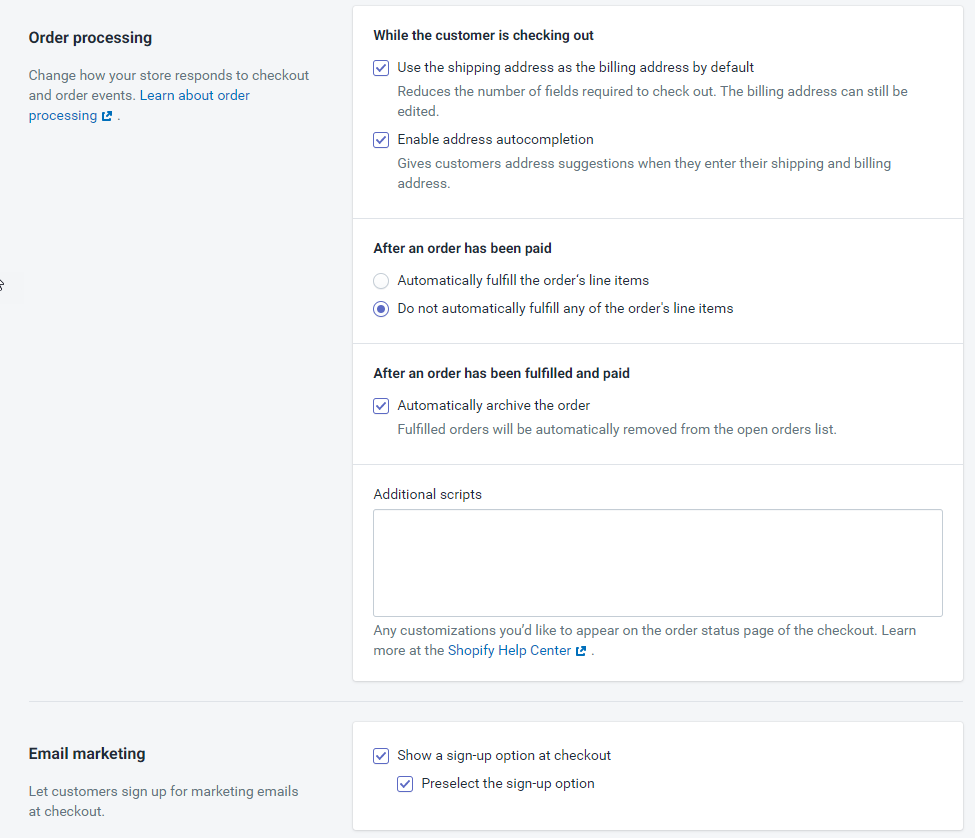
This will save your customers valuable time and make the checkout process much faster. We also preselect the sign-up option but make sure you check the rules because in Europe I think it can’t be selected by default.
To Sum It Up:
This article covered almost everything you need to know about creating your first successful Shopify store. You now know that you don’t have to spend hundreds of dollars on designs and unnecessary apps to have a profitable dropshipping store.
A premium theme or a $300 logo aren’t going to bring you sales if your store isn’t optimized for sales and your products + ads suck… Remember to invest the majority of your money on the things that matter like traffic, products costs, ads, etc.
Hope you liked the first part of this free dropshipping course.
Good luck!
Struggling to find good products to sell? Not sure who’s your target audience? Tired of losing money on products you were sure were “winners”?
Then Ecomhunt is what you need! Find hot winning products that are added daily, spy on their ads & stores and import them into your store in 1 click and Start Selling Today!
Must Read Articles:
- 6-Figure Winning Product Revealed – Winning Product Drill Down
- 5 Dropshipping Youtube Channels You MUST Follow
- Learn To Read And Understand Facebook Ad Results

Daniel Aloni is one of the leading mentors in the Ecomhunt family. Daniel is a highly experienced Print On Demand seller with multiple 6 figures successful launches.


