")


Welcome to the second part of how to create the perfect CBO campaign on Facebook blog series!
In the first part, I showed you how to setup your first CBO campaign and what options you need to choose. I didn’t go too much into details because it was just to show you how to do it in the right way. But today’s second part is going to be about all the details 😉
In this part, I’m going to talk about Campaign Types, Pixels and Targeting – I want you to really understand the logic behind the stuff we do when we create the perfect CBO campaign and not just COPY-PASTE it with no clue about what’s going on.
If you missed the first part, you can read it here.
1. Campaign Types / Campaign Objectives
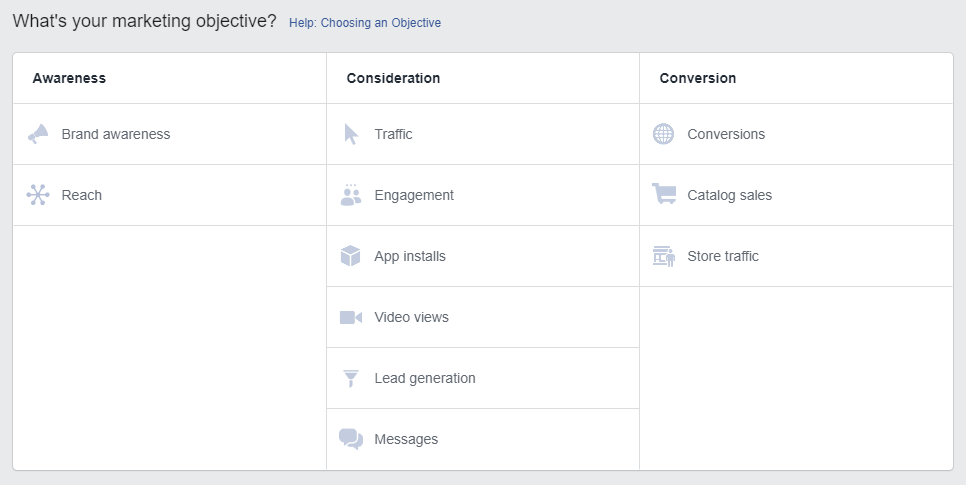
When creating a new campaign and choosing “guided creation”, this is the screen you’ll see. The next step will be to choose the right campaign objective that will bring us closer to our goal.
If there’s a new pizza place in town and it wants to get some attention from the locals, then brand awareness or reach campaign could work really well. If someone has a blog and wants to get people to read his articles, then a Traffic campaign is the right choice to bring readers.
Over the years, Facebook has perfected their system to exactly deliver what we ask for – If 3-4 years ago I was running Engagement campaigns to get sales(and I was getting them!), if I do it now I’ll mostly get likes/comments/shares and that’s it. I’m no saying you can’t get sales by running Engagement campaigns, but the chances are really low.
Facebook has categorized the users into buyers, watchers, commenters, etc. If I choose Video Views objective, Facebook will know to grab only the users who are most likely to watch my video. Again maybe some of them will buy, but it won’t be even close to the order I could get if I asked Facebook to bring me the buyers(Conversion campaign).
Let’s go back to the Pizza place example: Instead of Brand awareness, the owner could go with an Engagement campaign and target his local area. He will probably get likes, comments, shares, etc and feel like he’s doing a great job but in the end, what he needs is people to visit his pizza place. Instead if he used brand awareness, maybe Facebook would likely target people who go often on weekends to let them know about this new delicious pizza place.
Same goes with the blog owner – He can get link clicks on his ad using Engagement campaign but it won’t be the same if he used the Traffic Campaign.
So you now probably understand that in order to get sales, we need to choose the Conversion campaign and nothing else. This will give us the highest chance of getting sales on our test campaigns and with limited budget, it will be a shame to waste our money on Objectives which won’t work.
With Conversion campaign, Facebook will pick the people who are more likely to buy our product based on the data they collect on us. It can be how often they buy online, their credit score, impulsive buyers or not, etc.
Facebook is a data machine and I suggest you let them do their job and don’t try reinventing the wheel.
2. Facebook Pixel
![]()
Facebook can’t collect data on our site from thin air and they need their own little agent to report back and share all the juicy details. This agent, called the pixel, is a short code snippet that appears on all our store pages so it can collect the data Facebook needs.
If someone with a Facebook account visits our site, they can identify him and record all his actions to later classify this user and place him in a certain consumer category. And he doesn’t have to visit Facebook first and then our store, he only needs to be a Facebook user and the pixel will recognize him. So if you drive traffic only from google, installing a Facebook pixel on your store will be a wise choice to later collect and build audiences on Facebook.
So by having a properly installed Facebook pixel on our store, we give Facebook the ability to collect data on our visitors.
What can we do with the data collected by Facebook?
- We can create custom audiences to build lookalike audiences, retargeting purposes, discover new audiences, and more.
- We feed Facebook with enough data for it to optimize and find the most relevant audience for us.
- We can see how people react to our product/content – If they like a product, they will at least add it to their cart or complete some other action on our site.
- We can easily check our results and create reports for future uses
- And more…
New or Old pixel, we always optimize for purchase.

It’s true that a pixel with data is better than a new pixel with no data at all – It will be much easier for Facebook to find the relevant audience for us based on previous purchase data. We’ll also spend less time waiting for optimization and probably spend less money on “testing” bad audiences.
But it doesn’t mean a new pixel with zero data will bring us no results… Even if Facebook warns us and suggests we start from View Content and move up, we still go for the purchase optimization. In this case, Facebook will still search for people who are more likely to buy but it will take more time and we will have to be patient and give it time.
Anyway, you’ll spend much less money and get actual results if you go with Purchase optimization and not View Content.
Important:
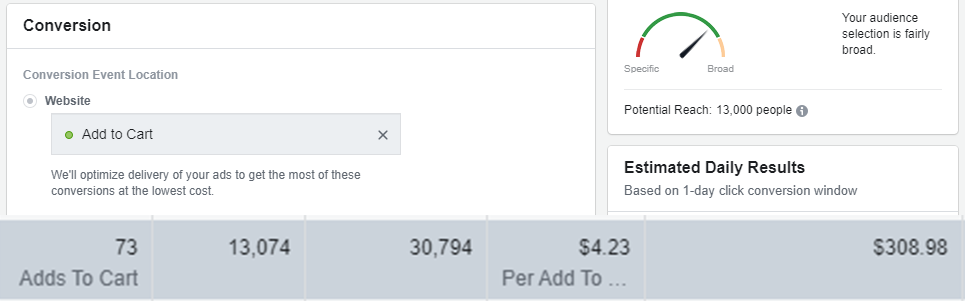
There are cases when Add to Cart or Initiate Checkout optimizations bring results and sometimes much better results than purchase optimization. Each ad account is different and one person can have better results with Purchase while other with Add to Cart.
I suggest you always test first with purchase and see how it goes. If you believe the product could perform better and you don’t want to give up, consider trying Add to Cart optimization and see what results it brings you.
Installing Facebook Pixel:
In most E-commerce platforms like Shopify, you only need the pixel code and they automatically place it for you in your store. If you have a private store, you will need to do it manually by following the install instructions on Facebook’s pixel page.
How to know your pixel works?
![]()
Option 1: Install Facebook pixel helper chrome extension so you can check if your pixel is active(on every page you visit) and what events were fired – See screenshot above. You can use the pixel helper to see if all events are properly fired too. Do yourself a favor and install the chrome extension 😉
Option 2: Inside the pixel tab in Facebook’s ads manager, you can click on the pixel you’re using and test the events. Pretty simple, just follow the instructions.
3. Targeting
Targeting is the direction we point Facebook to look for our audience.
There are a lot of methods of targeting online – From one interest per adset to laser targeting, each one is considered to be “the best” and gives us the lowest CPM. My tip for you is just do what you want…
If you want to target huge interests with 50m+ audiences, no problem at all. If you want to test audiences as small as 50k, just do it. Go for what you think is the right audience and test it out
I heard small audiences give you very high CPMs – Well one of my best audiences were women 35-44 and the size was 13k. Not only this audience gave me crazy cheap sales but the CPM was about the same as all my other adsets($9~$11).
Good thing I gave it a try right?
So if I were to listen to all the people saying small audiences don’t work, I would’ve lost plenty of sales because I had plenty of small audiences such as these running.
Now let’s look at something I never did and probably lost a lot of money: Before CBO campaigns, I never tested audiences larger than 1.5m. I thought for testing, audience size mustn’t be too big so I always kept it in the 1.2m~1.3m area.
If the campaign was already running and selling well, then of course I was testing HUGE audiences too and making sales. But maybe when testing one of my campaigns, I could’ve gotten much better results if I let it run on a 10m audience.
What audience sizes I personally test?
I have no problem testing big audiences and audiences around 100k. I can go for one interest per adset or multiple interests all layered down till I get an audience size of 100k. No particular method or anything special. If I feel the audience is right, I target it.
*I never used the expand detailed targeting option so I can’t really tell you if it’s good or not. But I think it’s worth a try if you have a good campaign going.*
My special rule:
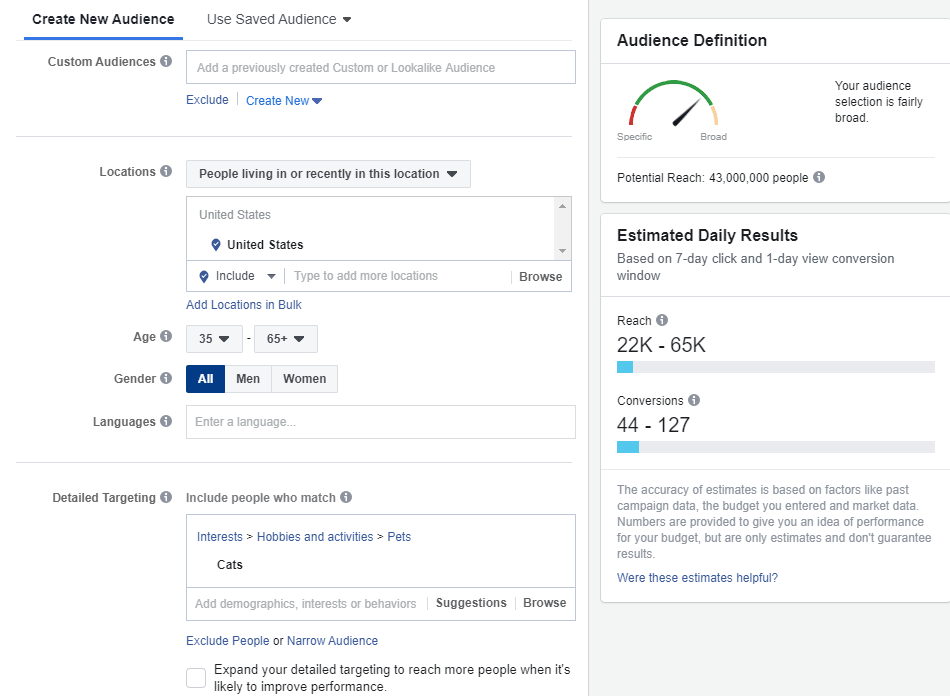
I hate wasting money so I do a really good research and target only the audience I think will buy. If I target a hardcore cat lovers product, then I will allocate my budget and use most of it to test women 35+ because they’re more likely to buy it than a 22 year old girl.
If I sell a cute necklace gift for women, I will target only men and probably start from 25 or even 35. You get the point.
Custom Audiences:
Above the country selection, you can see the custom audience targeting – This is where the audiences we made thanks to the pixel can be used. If you have a custom audiences of everyone who visited your site, you can just target them and offer a discount code for those who didn’t buy.
If there’s a new discount you don’t want your past buyers to see(so they don’t get upset), you can exclude them.
Country selection:
I usually target USA but I have no problem targeting Worldwide or Europe – It all depends on the product. Just make sure to select English(All) if your page in in english and you target Worldwide.
About the countries: If I go Worldwide, I target only epacket countries.
Interests:
I use it all – If I find targeting by income + interest is a better option than just picking only the interest, then I do it. If there’s a product only available to iPhone users, I will target only iPhone users and not “all devices”.
Placements:
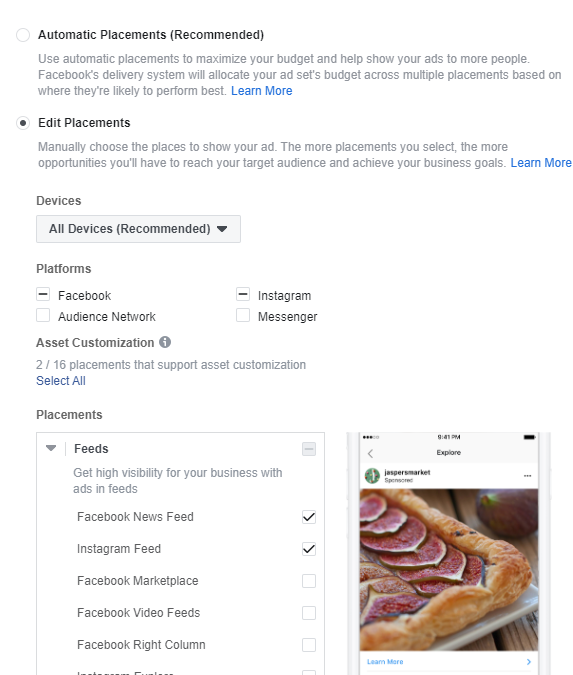
I usually go with Instagram and Facebook feeds but only if it’s in my niche. If it isn’t, I leave the placements on Automatic and let it run. Once I get enough results, I know which placement works best and I shut down all the rest.
Important: By shutting it down, I mean the new duplicate adset I make will have only the working placements. I never touch a working adset because it can go back to learning mode and stop bringing results.
Optimization & Delivery:
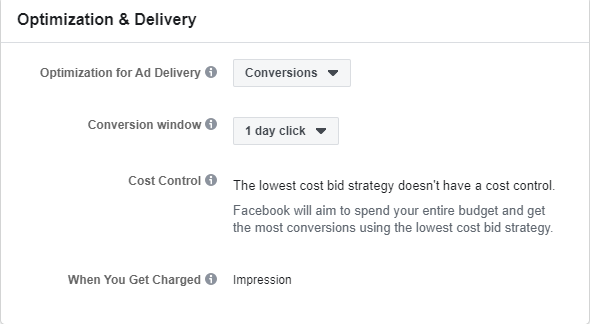
I leave it of course on Conversions and the only thing I change is the conversion window. I find the 1 day click window to work better when I look for people who are most likely to buy my product after the first click.
I know a lot of people who use the 7 day window with success and some say this window click stuff won’t change anything. I personally found out the 1 day window to work much better for me than the 7 day or others.
Some people mix it up and use 1 day for cold targeting and 7 day for when they retarget people. That’s because the retargeting audience are more likely to buy after a few days after they first clicked on your ad. It’s logical…
To Sum It Up:
As promised, the second part of the article is more detailed and I chose to speak about the campaign objectives, pixel and targeting.
Next week’s article will be all about different type of ads.
Thank you for reading and I hope you liked the second part of the series 🙂
Struggling to find good products to sell? Not sure who’s your target audience? Tired of losing money on products you were sure were “winners”?
Then Ecomhunt is what you need! Find hot winning products that are added daily, spy on their ads & stores and import them into your store in 1 click and Start Selling Today!
Must Read Articles:
- How To Create The Perfect CBO Campaign On Facebook – Facebook CBO Campaign From A to Z – Part 1
- Learn To Read And Understand Facebook Ad Results
- Getting Traffic But No Sales? Here Are All The Possible Causes and Solutions

Daniel Aloni is one of the leading mentors in the Ecomhunt family. Daniel is a highly experienced Print On Demand seller with multiple 6 figures successful launches.


How do you exclude people that have bought your product from those that have not bought for retargeting
You simply create an audience of everyone who bought a certain product or just general all “purchase” events and you exclude this audience when retargeting 🙂
for a new pixel, some gurus said maturing your pixel is very important. what do you think about it?
A waste of money in my opinion… We go straight to purchase optimization and same for most dropshippers we know. If the ad and product are good, you’ll get sales.