These e-commerce hacks will show you how you can improve your online store’s speed manually or by using automatic apps, and how to locate unseen problems on your store so you don’t lose any sales.
Welcome to the second part of the ultimate e-commerce hacks for dropshippers blog series which will show you how to do it like the pros. The second part is all about improving your online store speed and locating problems for you to not lose any sales. The example will be shown on a Shopify store, but can be replicated on every online store no matter the platform.
If you missed the first part, you can read it by clicking here.
Enjoy!
Running a successful dropshipping store isn’t an easy task… If you want to make sales, your ad, product, and store need to be perfect. If you miss just a single detail, there’s a chance you will lose sales. But there are some things that customers simply don’t tolerate, and in this case you will get no sales at all!
Stuff like slow loading speed which hold your customers from viewing your product, will quickly push them away from your store. So before you run any ads to your store, you have to make sure the loading speed is normal.
So just follow my tips below to check your store speed and improve it if needed.
Before We Begin… Beware of GIFs!

Before I go into explaining how to check your site’s speed and how to improve it, I want to first talk about GIFs. GIFs, as you all know, are these short animated pictures that almost every dropshipper out there is placing in his/her product page.
Using GIFs in your product page description is a great way to show the product’s features, and make the product page look more appealing to the eye. Sometimes you want to cover some extra features that weren’t show in the original video ad, or show different variations of the product, so adding 2-3 GIFs instead of multiple pictures(or more text) is a great solution.
BUT sometimes things don’t go as planned and the GIFs you have added to your product page make it load slowly. This issue is very common and the problem is that it can be easily missed, especially if you’re a beginner.
At first, the uploaded GIFs cause no issues at all and the product page, once published, is loaded normally at a normal speed with all GIFs working as intended. Then a day or two after that, when you already started driving traffic, you suddenly realize that some of the GIFs are loading slowly or don’t work at all.
When some of your GIFs doesn’t load at all, it makes your product page look unprofessional. When your GIFs cause the whole page to load slowly, this is already a bigger problem which can cause even the most passionate customer leave your store without buying…
So before adding any GIFs to your product page, here’s a few tips to do it the right way:
1. Upload your own GIFs – Don’t add GIFs from external links like Giphy and others. These GIF files can be suddenly blocked which will stop them from displaying on your site. Or a sudden server issue can make them load slower than usual, thus making your whole product page load slower than usual. Create your own GIFs, and upload them manually.
2. Keep them short – You just showed people a whole ad about your product so keep your GIFs short. Up to 5 seconds max per GIF is more than enough… And of course the obvious reason: The longer it is, the more time it will take to load.
3. If it’s too heavy, resize it – There are plenty of websites out there that can optimize your GIFs online. If it takes too much time to load, reduce the file size for it to load faster.
4. Check your Shopify apps load speed too – Sometimes your GIFs can make your Shopify apps load slower than usual. It can be a scarcity timer app, or one that just adds some trust badges to your page, which work fine up until you add some GIFs to your product page. The app features then load with a big delay which isn’t good… Always check if your Shopify apps load normally after adding some GIFs to your product page. If they load slower than usual, you can either fix the GIFs or remove them completely.
5. Don’t use GIFs at all – I personally don’t use GIFs in my product description and prefer to use text + HQ pictures only. I already showed everything about the product in my video ad so high quality pictures + text on my product page is enough. And I also don’t have to worry about loading speed or other issues.
Now that I’m done explaining about GIFs, we can finally move on and talk about store speed testing and optimization(if needed).
How To Check Your Online Store’s Loading Speed?

The first way is to use websites like GTmetrix and Google’s PageSpeed Insights where all you need is to type your store URL and their system will analyze it for you. These services also check if your images need some optimization, and look for JS and CSS code issues.
So in the end, the final report will look like this:
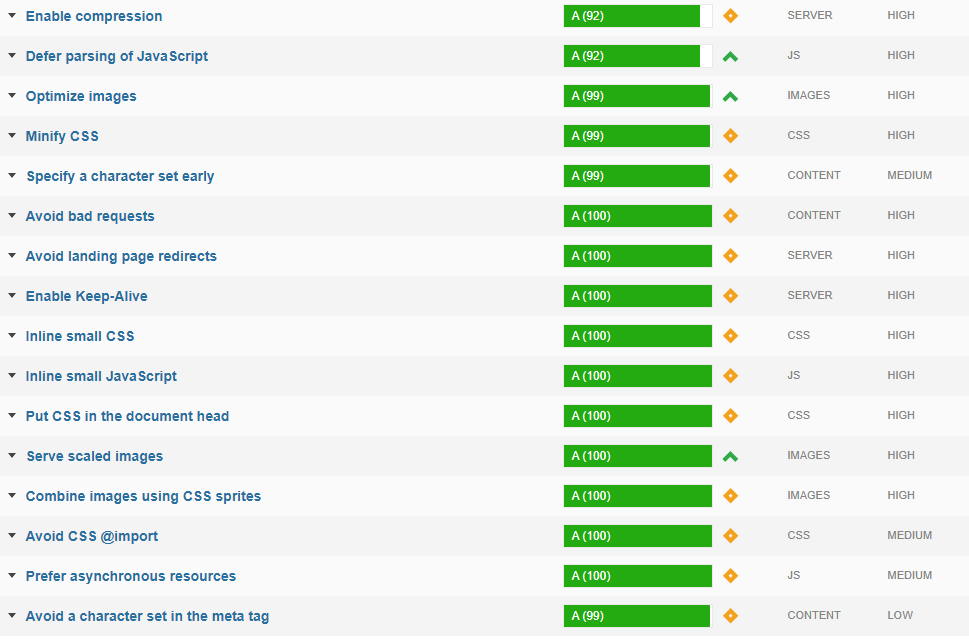
This might scare you and I’m sure most of you will have no idea what it means and what to do after the report… So don’t do anything rash like deleting bunch of code lines or removing images. At Ecomhunt, we’ve reviewed thousands of online stores and in most cases the loading speed was normal.
Shopify doesn’t limit your store’s bandwith in anyway and they host your online store on fast, global servers. This means that your store will load fast, and your customers won’t have any issues browsing your store.
Still, there are some cases that can make your store load slower than average:
- Installing private themes – Shopify theme store isn’t the only place that sells themes you can install on your online store. There are other theme marketplaces, like themeforest & others, that aren’t connected to Shopify where you can buy private themes and install them on your store. These can be not well optimized and thus cause your store load slower than usual, so to avoid that just choose themes from Shopify’s theme store.
- Loading your store with Shopify apps – Even if the app is on Shopify’s app marketplace, this doesn’t mean it can’t slow down your store. When you install a new app on your store, it adds custom code to work properly. This custom code can sometimes make your store load slower and if you bombard your store with a lot of apps, it’ll definitely slow it down. Keep your store clean and install only the apps you absolutely need. If you want to experiment by installing a bunch of apps, open a new store and do it from there.
- Installing private apps – Shopify allows its store owners to publish and install private apps. Same as with private themes, you can simply install a private app and start using it on your store with no limitations. Install only if you must and make sure you know the developers behind it.
- Customer internet connection & device – Your store load speed also depends on your customer’s internet connection. If he has a slow connection, your store will load slowly for him no matter how well optimized it is. It can be also a slow device issue where it will take him forever to load your store… So if one customer contacts you about your store speed, it doesn’t mean it’s the same issue with everyone else.
Another issue is with badly optimized images you use on your store – From banner images to product images, these need to be compressed for your store to load fast. Like I said before, most of the times there weren’t any speed related issues when we reviewed the stores of our Ecomhunt users.
But when it comes to images, there were a lot of stores that needed some optimizing… Even if your store loads fast, you should always strive to make it load faster to increase your overall conversion rate.
Take for example Walmart – They found out that for every 1 second improvement in page load time, conversions increased by 2%. And plenty of other examples from big companies out there on how the conversion increased by reducing page load speed.
So how can you optimize the images on your store?
- Do it manually with services like TinyPNG – TinyPNG allows you to optimize PNG and JPEG files by compressing them. You can use this service to compress your product pictures before uploading them to Shopify.
- Use a Shopify app – Apps like AVADA SEO Image Optimizer OR TinyIMG SEO Image Optimizer can do it for you automatically and in 1 click optimize all your store’s images. These apps also improve image-related SEO, and do some more auto optimizing on your theme. Instead of doing it manually, you can use one of the apps to automatically optimize everything for you 🙂
Optimized images will make your store load faster, offering your users a better shopping experience!
Now that you know how to check your store’s loading speed and how to improve it, it’s time to check what your users doing on your store. If we can see exactly what they’re doing and how they interact with it, we can then improve it.
Introducing Hotjar – See What Visitors Are Really Doing On Your Store
Hotjar is a wonderful tool any store owner must have installed! This tool saved me at least twice by showing me an issue my users were having with one of my Shopify apps and by showing me an Add to Cart bug that was killing some of my sales.
Hotjar lets you record exactly what visitors are doing on your store, both on desktop and mobile devices, so you can monitor them and hopefully find a way to improve your store. For example, if you’re advertising your store with Influencers, you can check what products they click the most on your front page. Or just check the heatmap to see where most of your visitors look and click.
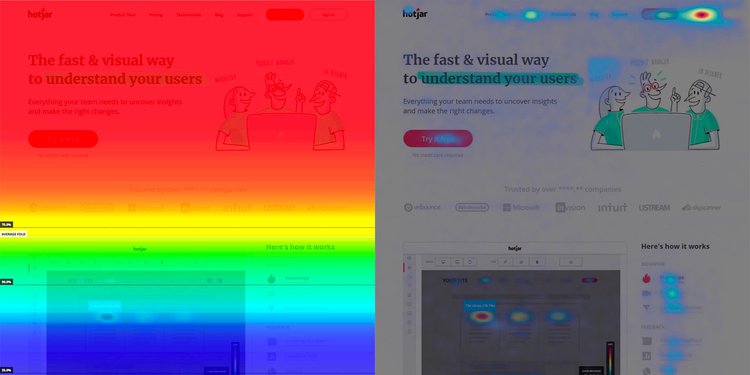
So if you know where most of the visitors lands on, let’s say it’s the “shoes” category on your front page, then you can expand it to show more shoes on the front page. Or if you know what product most of your users click on, you can add a special discount to convert more people into paying customers.
But maybe the most important role of Hotjar, in my opinion, is to find problems/bugs that can cause customer to leave without buying. I had 2 cases where Hotjar saved my ass*(excuse my french) and one of them would never be found without Hotjar.
So the first issue I had is with one of my installed apps that allowed file upload, in my case pictures, so I can later customize the product and send the ready product to my customer. The product was great, the audience was really passionate, but for some reason my conversion rate was pretty low with a lot of abandon carts…
When checking the recordings on Hotjar, I quickly noticed the issue was with how the uploaded files were displayed both on my product page and the cart page.
This is how the uploaded file was displayed:

A customer who clicked on the Choose File button and uploaded his picture, saw only the file name as a line of text. When I tested it, I didn’t see any issue and was pretty happy with how the app uploads the product. I found it very simple and understood the file I chose was uploaded successfully.
But my customers thought differently… Once uploaded, they expected to see some sort of preview. Some of them clicked on the button again just to be sure they uploaded to correct photo. This prolonged the checkout process and only confused my customers.
On the cart page, the uploaded file name was clickable and some of my customers just had to click it again to be sure it’s the correct picture. In some cases, after opening the picture on their phones and clicking back, they just existed my store(I could not see that but I figured out this is what happened, because once they clicked on it the recording ended).
I then made a simple decision to delete the app I was using and install one that won’t confuse my customers. The app I installed is the only app from all the apps I checked back then that did exactly what I needed.
First of all, it displayed the uploaded picture like this(both on product and cart pages):
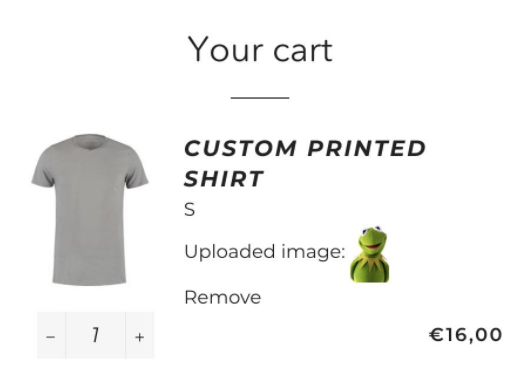
Now my customers could finally see a preview of the picture they uploaded and they didn’t have to double or triple check it again. Once they clicked on the picture, it opened up in a small window to keep my store open in the background so they don’t accidentally leave my store. This app also had a much better upload interface, I think the best one from all the apps out there.
A lot of confusion gone and I instantly saw an increase in my conversion rate – The customers easily uploaded their pictures and I was making some good sales.
Just in case, the good upload app I am using is Upload Fields by UploadKit.
The second issue Hotjar has helped me to discover was an Add to Cart bug where it was adding x2 of the original product. If a customer was trying to purchase only one necklace, it was showing 2 necklaces when he was already on the cart page.
This may seem as a small issue where the customer needs to just simply remove one of the necklaces but it left some of them confused instead. Some who tried to remove one necklace didn’t manage to do it properly and just hit the return button. Some were angry(I guess) because they thought this was a maneuver to pull more money out of their pockets.
This bug wasn’t there when I checked from my PC and phone so it was a problem on some other devices. Eventually it’s a bug that needed to be fixed and thanks to checking the recordings on Hotjar, I managed to find it and later fix it(This was a custom product page provided by a private app – Chances of something like that happening or normal themes are zero).
So now that you’ve seen how important Hotjar is, here’s a few tips to get you started with it:
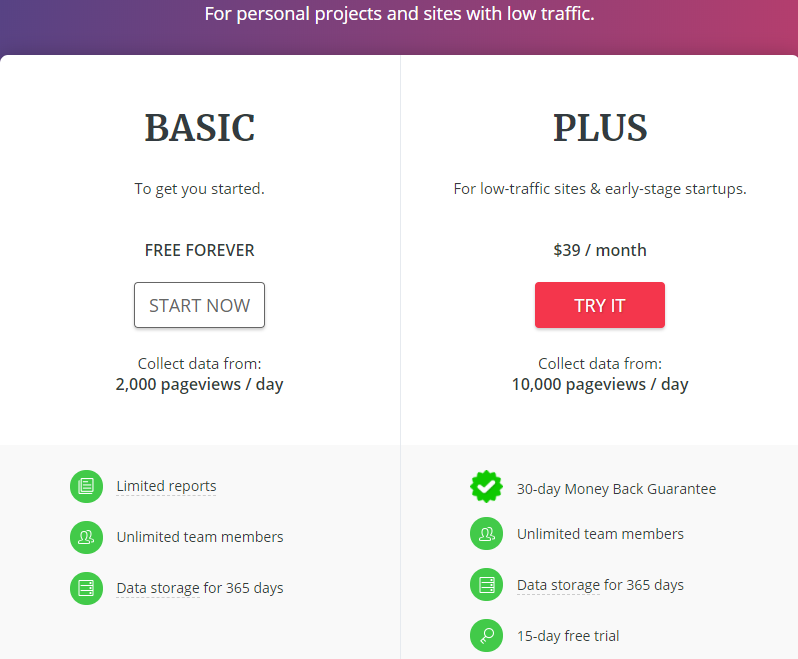
1. Use the free, basic version – It costs absolutely nothing and requires no credit card to start using Hotjar for free. It’s limited to 2,000 pageviews a day which is enough if you’re only starting your dropshipping journey.
You can record a maximum of 300 recordinsg(200 after the first 300) and if you want to record more, you’ll have to delete the old ones completely. There’s also a very simple heatmap report for your store which I find enough for beginners.
2. Don’t skip recordings – You may find it boring a bit because nothing really happens, but there can be a bug when using a specific device so if you skip some recordings you may miss it.
3. Check your store’s heatmap – It always helps to see which pages most of your visitors click and where do they stop scrolling. It can be that most of them don’t scroll down too much so you have to make sure all the needed information is visible on top. If you’re using influencers to drive traffic, it’s important to know how visitors behave on your front page and on what products they click. Sometimes a product that you thought isn’t the best can be the one that draws the most attention.
4. It’s super easy to install – No need to edit existing codes and you’re only required with a simple COPY-PAST for Hotjar to work. If the Shopify installation guide on Hotjar seems difficult, you can always ask someone on Fiverr to do it for you. $5 or a maximum of $10 for this really simple task.
There are also other apps like Hotjar out there but I have no experience with them so I can only recommend this one.
To Sum It Up:
Follow this article’s tips to finally end the worries about your store’s loading speed, and most importantly to help you to locate any issues or bugs you have on your store. Then you can be finally sure your store is bug free and runs as it should.
I hope you liked the second part of this blog series!
Good luck.
Struggling to find good products to sell? Not sure who’s your target audience? Tired of losing money on products you were sure were “winners”?
Then Ecomhunt is what you need! Find hot winning products that are added daily, spy on their ads & stores and import them into your store in 1 click and Start Selling Today!
Must Read Articles:
- The Ultimate E-Commerce Hacks For Dropshippers – Optimizing Your Shopify Store For Conversions (Part 1)
- 3 Important Things You Can Learn & Discover From A Viral Facebook Ad
- This Winning Product Was Posted Less Than 3 Weeks Ago And Now It’s Exploding In Sales!

Daniel Aloni is one of the leading mentors in the Ecomhunt family. Daniel is a highly experienced Print On Demand seller with multiple 6 figures successful launches.














Extremely helpful – thank you!