")


")
These 5 e-commerce hacks will increase your online store’s conversion rate by removing unnecessary steps that slow the checkout process. Offer a much smoother checkout experience and will ease the mind of your customers.
Welcome to the first part of the ultimate e-commerce hacks for dropshippers blog series which will show you how to do it like the pros. The first part is all about Store optimization which will be shown on a Shopify store, but can be replicated on every online store no matter the platform.
Enjoy!

1. Disabling Add to Cart Notification – Transferring Customers Straight To The Cart Page
One of the first things every new dropshipper must realize is that his store isn’t Amazon or Ebay. No customer out there is going to walk in, add a bunch of random products to the cart page, and then proceed to checkout. In most cases, it’s going to be a single item purchase and maybe an upsell.
How can you be so sure this is what happens in most cases?
- Experience – We’ve been dropshipping for years now and spent millions on ads to get paying customers to our stores. Customers visit your store due to one item they saw and really liked on Facebook so their aim is to just buy it and that’s it. If you want them to spend more, you should aim for a cool and relevant upsell or offer a sweet deal like quantity discounts on multiple item purchase.
- A random dropshipping store isn’t a place for a shopping spree – When looking to buy new clothes, would you go rather go to a nameless clothing store or visit the mall where the big brands are? I bet most of you will go to the mall if you need to update your wardrobe. Same happens with online stores… If you need to buy a bunch of stuff, most of the times you’ll go straight to Amazon, Ebay, and other big online shops and do your shopping there. The only time you’ll actually buy from a small online store is ONLY if you find something that you didn’t know you needed.
And this is exactly how dropshipping works – You run ads for a winning product and show it to a relevant audience you think will find this product useful. You catch them off guard with an awesome ad and convince them they need this product right now. Once they click on your link and visit your store, your mission is to seal the deal as fast as possible without any unnecessary interruptions.
When you finally get that sale, this is when you can think about getting more money from your customer. Email marketing, retargeting ads for new products, SMS marketing, etc… It’s much easier to sell again to an existing customer than getting a new one.
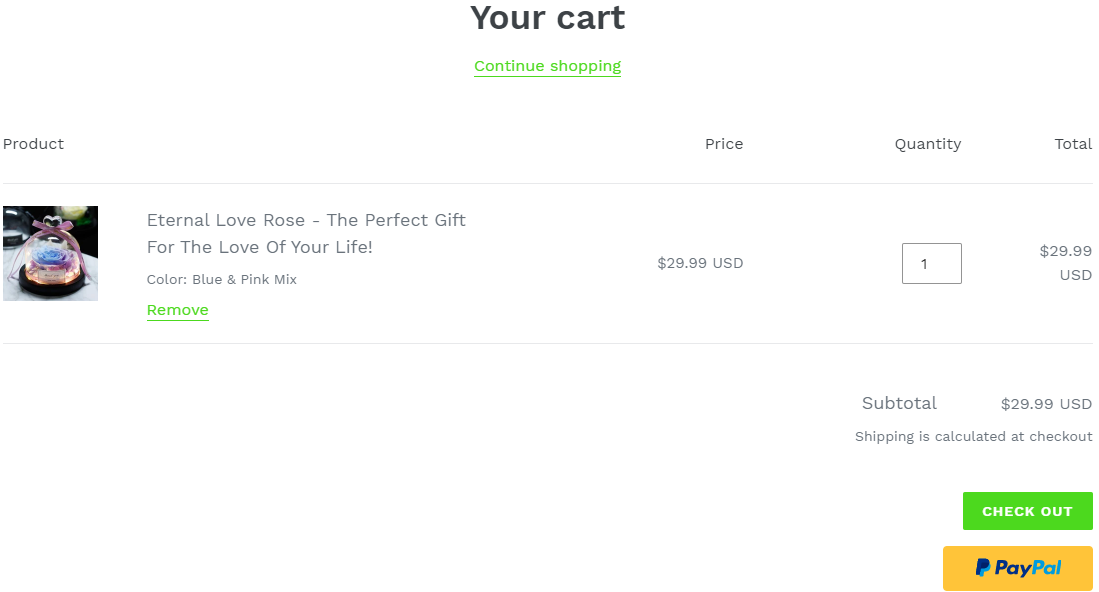
So as you probably understand, showing Add to Cart notification is just going to prolong the checkout process:
You give your customer “time to think” about his purchase and the ability to start browsing your store. To avoid this, we will transfer our customer straight to the cart page to keep a healthy checkout flow.
How to disable Add to Cart Notification and transfer customers straight to the cart page
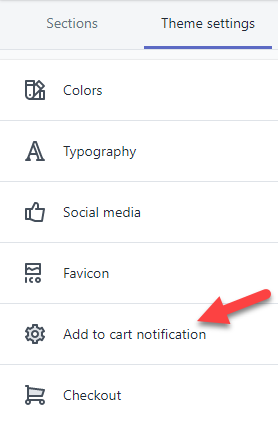
1. Go to your theme settings and click on “Add to cart notification”:
2. Uncheck the box that says “Show notification when item is added to cart”:
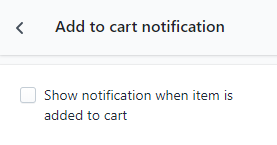
That’s it! Your customers will no longer stay on the product page when clicking the Add to Cart button, and they will be redirected to the cart page instead. The Add to Cart notification is enabled by default in most free themes I’ve seen so don’t forget to disable it.
2. Disabling Product Recommendations
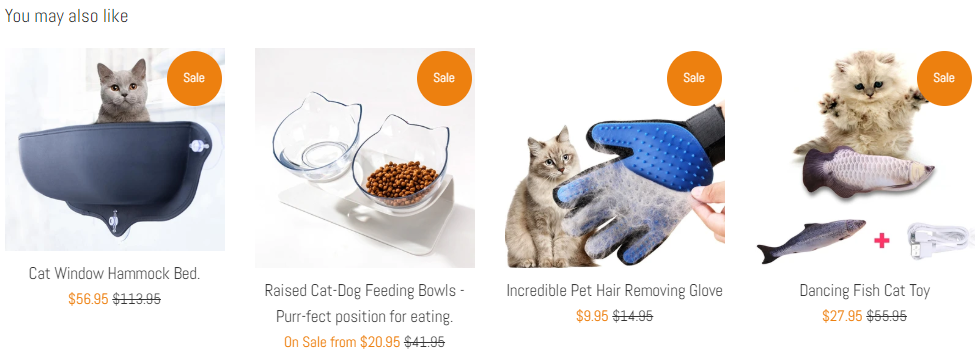
The same logic as with the Add to Cart notification is also applied here. The “you may also like” section may work well on Amazon and increase the AOV(Average Order Value) for each customer, but in our case it will probably do more harm than good.
New dropshippers think that the customer is going to click on a product, add it to cart if he likes it, and then proceed to checkout when he has more items in his cart. In reality, he will click on one product, then on a different one, and after 30 seconds he will forget the reason why he visited your store in the first place…
And do you know what happens next? He will leave your store without buying a thing! Yes, there’s a chance he will actually proceed to checkout with some extra items in his cart but the chances of that are pretty low. Like I said, it’s more likely he will get lost and leave your store without buying.
So I prefer first to focus on getting that single sale as fast as possible and as simple as possible. For that, I ALWAYS disable the product recommendations and keep my product page clean from other products. A simple & clean product page without any suggestions that will make my customer “think”.
How to disable Product Recommendations to keep our product page clean
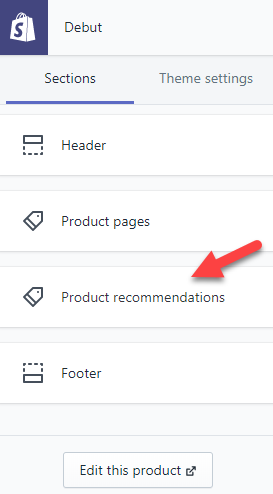
1. Go to your theme editor and click on a random product in your store. You will see the sections change and new options will appear. Click on “Product recommendations”.
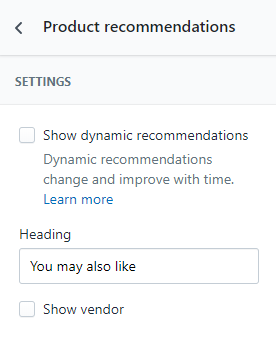
2. Uncheck the box that says “Show dynamic recommendations”:
That’s it! Your product page is now be clean from other products and your customer will only see the product he originally came for.
3. Changing Button Colors – Both On Product & Checkout Pages
There’s a hole science behind color psychology in e-commerce and this means that the colors people see on your online store will have an impact. So if you want to maximize your online store’s conversion rate, you need to choose the colors you use carefully.
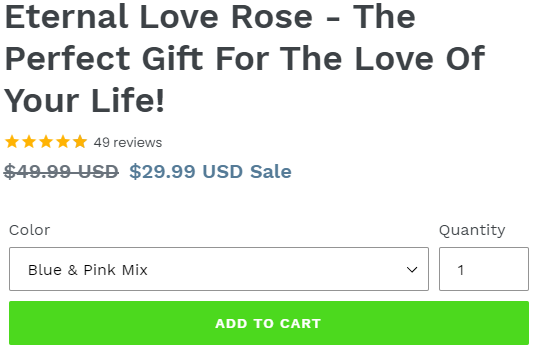
I understand that if your logo color is purple, it can be cool to have your theme colors match it so your store design looks better. Personally, like other big dropshipping stores, I stick with a single color for all my buttons which is green.
I don’t care if my logo color is mostly blue with some red stripes, I always keep my buttons green. Why green you ask? If you read about it online, you’ll see how green color is one of the best to calm your buyers and it’s the easiest for the eyes to process.

Taken from https://www.ecommerce-nation.com/color-psychology-for-ecommerce/ – Click the link to learn more about color psychology. So no matter what, I keep my buttons green on all of our dropshipping stores.
Changing the buttons color is pretty easy and can be quickly done in your theme editor.
1. Go to your theme settings(in the editor) and click on Colors:
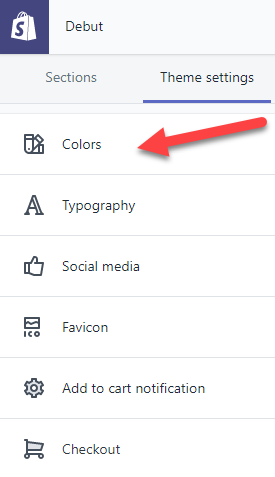
2. Click on Primary buttons and then change it to green:
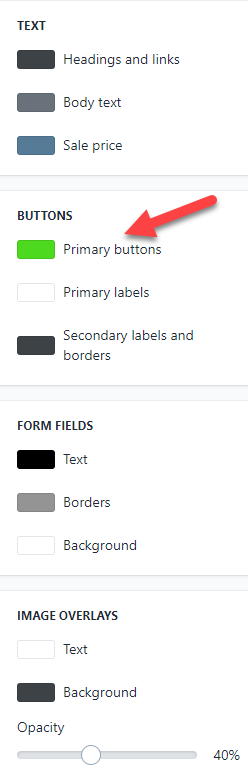
New dropshippers think this will change all the button colors to green, where, in fact, this will change the buttons color on your product page and cart page only. If you want to change the buttons color on the checkout page(and you should), you’ll need to:
1. Click on Checkout in Theme settings
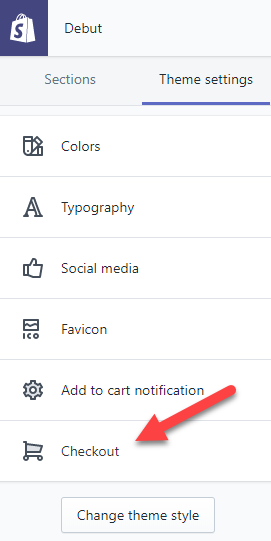
2. Scroll down till you see colors and change the buttons color to green again
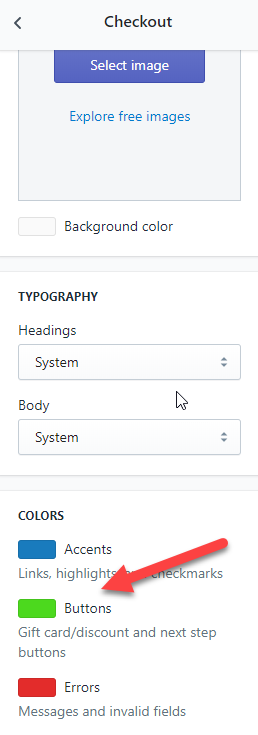
Only after you change the buttons color on theme settings too, you’ll be done with it. By default, the checkout buttons are usually blue so don’t forget to edit the colors on your next or existing Shopify store.
4. Adding Trust Badges On Product & Checkout Pages + Guarantees
A customer visiting your store needs to feel safe purchasing from you every step of the way. When your customer clicks on your link and lands on the advertised product page, he will need to have some guarantees that his money will be secured. On top of that, he will also needs some guarantees the item he’s going to purchase will actually arrive.
If your customer visits a store with no trust badges and guarantees, just a blank product page with a short description, he will probably leave the store without buying a thing. No matter how good the product or the ad are, he needs to trust you before everything else!
So here’s what your customers need to see:
1. Product Page
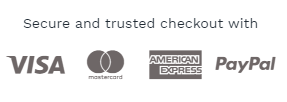
Right below the Add to Cart button, there should be secured payment trust badges. Visa/PayPal/American Express symbols with a short line of text above or below the icons.
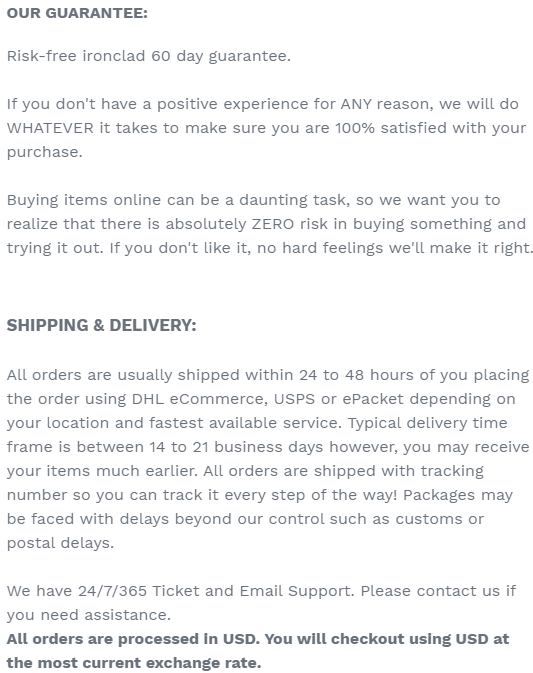
Finish your product description with Risk & Shipping/Delivery guarantees. Copy from someone else’s store or write your own, just don’t promise something you can’t do like 7 day delivery when you dropship from China. In most cases, this will keep your customers calm and you don’t have to worry about sudden mass refunds because you offered free 30-60 day refunds.
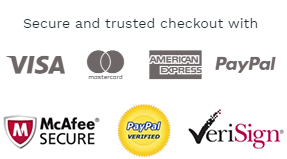
And at the bottom, right after the above guarantees, add some more trust badges.

Every product page for every product we have on our dropshipping stores is structured the same way with the same exact badges and texts. This should be enough to make your customers trust you and buy from you.
2. Checkout Page
Your logo will only appear on your front pages and if you want it to appear on the checkout pages too(you should), you will have to upload it again. Navigate to checkout settings in the theme editor and upload your logo.
![]()
Now to make your store look more trustful, especially on the checkout pages, we always add trust badges to our logo. It can be easily done on photoshop so the final version should look something like that:
![]()
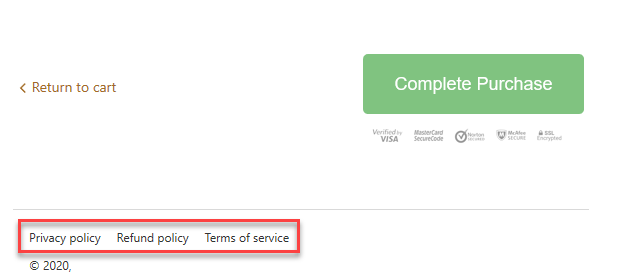
The logo and the trust badges will be shown on all checkout pages.
In addition, we’ll also need to show the policy, refund, and term of service links on the checkout pages.
For these links to appear on the checkout pages, you will first need to generate them in your Shopify store settings.
1. Go to Settings and click on Legal:
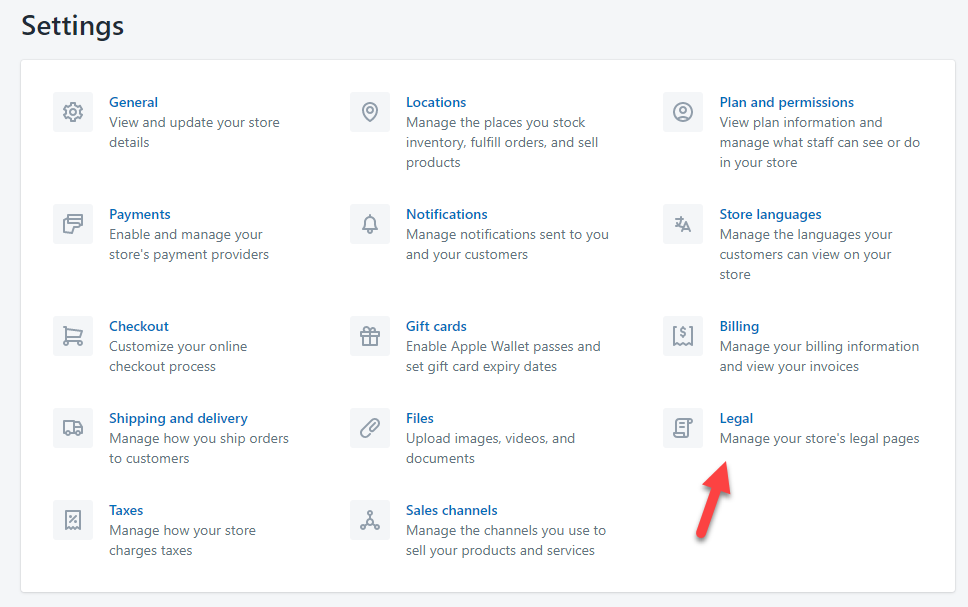
2. There you will see a generate button which will automatically generate all the policy pages needed for your store. Shopify by default uses your store settings like legal business name and physical address so feel free to edit them in the generated text box. Once you save the generated pages, they will automatically appear on the checkout pages.
Note:
For these links to appear in the footer of your store, next to all your other pages, you will have to manually add them.
Important:
It will really help the customers to trust your store if you have a well written About Us page and a built-in tracking page. A built-in tracking page can be done by downloading a tracking app in the Shopify app store and it will help customers track their package without leaving your store. This will help them feel safe that the product they’re going to buy can be actually tracked 🙂
And of course let’s not forget the reviews for every product you dropship on your store. Import good reviews with photos to boost your conversion rate! Make sure their are no weird typos and import only good, 4 & 5 star reviews.
5. Editing Default Texts On Cart & Checkout Pages – Especially Important For “Free Shipping” Dropshipping Stores

It’s important for your customer to always know exactly what he’s getting – If you offer some kind of a deal, like a free shipping one, then it should be clear on EVERY page he visits. Having an announcement bar with a “free shipping on all orders” text on the product page, and then showing “taxes and shipping are calculated at checkout” can make you lose sales.
Contradicting your offers will confuse your customers and because of that some of them might leave without buying…
Imagine adding a product on Amazon where it says free shipping only to see that offer disappear on the cart page. Would you proceed with your order? In my case, I would go back to the previous page to see if I missed a small detail about the free shipping deal. Other people might think it’s a trick to make them add the product to the cart so they eventually buy it, and because of that they will leave without placing any order.
So how can we avoid confusing our customers? It’s simple. We will simply change the default Shopify texts to suit our needs better.
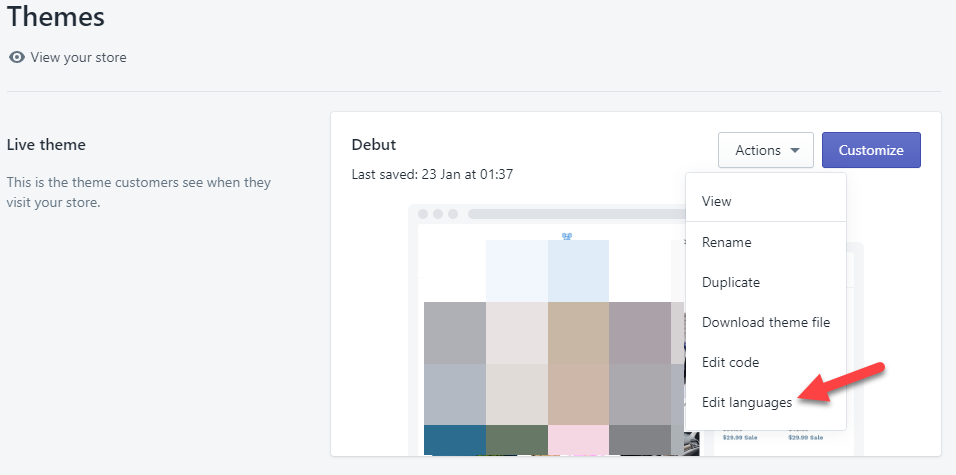
1. On Shopify go to Themes, click on Actions, and choose Edit languages from the dropdown list.
2. Next click on the Cart tab to get access to all the default texts that appear on the cart page.

Our first mission is to change the default text to one that suits our store better. So if you offer free shipping on all your order, you can change the default text to something like “Free Shipping is automatically applied for this order”. Of course, if you don’t offer a free shipping deal on all your orders, then you can leave the text as it is.
3. And let’s not forget the texts on the checkout pages.
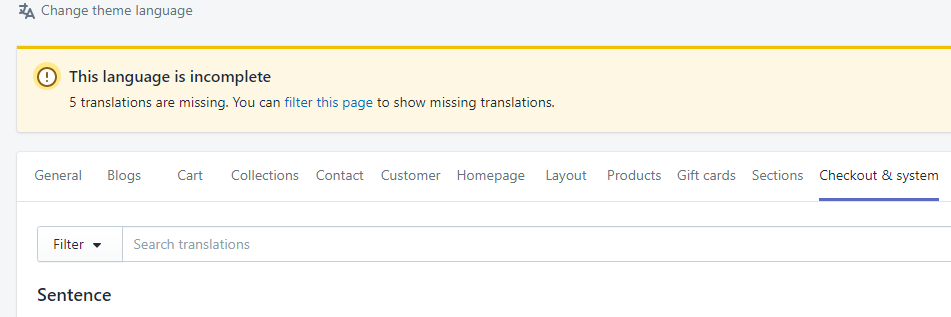
In this tab, we have the option to change any default text that appears on the checkout pages(contact information, shipping, and payment) to something more suitable for our store. For example, if you have a free shipping store, then you can change the following on your contact information page.
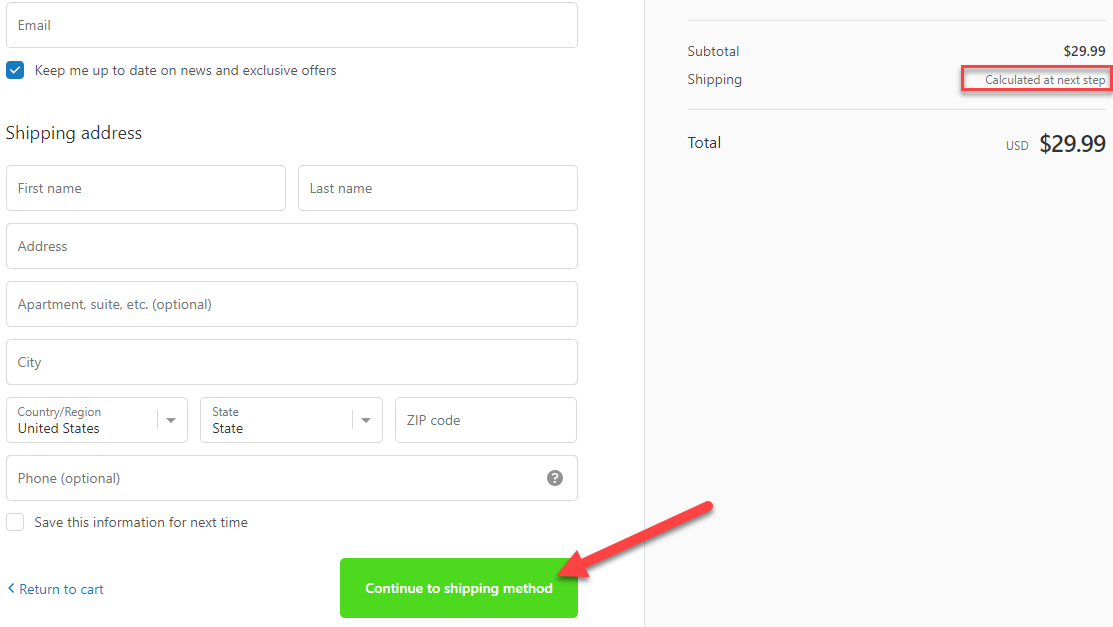
The text value under Shipping which is “calculated at next step” can be changed to “Free shipping applied”. The button with the text “Continue to shipping method” can be changed to “Continue & apply free shipping”. Minor changes that necessary to not confuse our customers(And it will also increase the amount of people who will proceed to the next step).
On the next page, which is the shipping page, you should also change some texts.
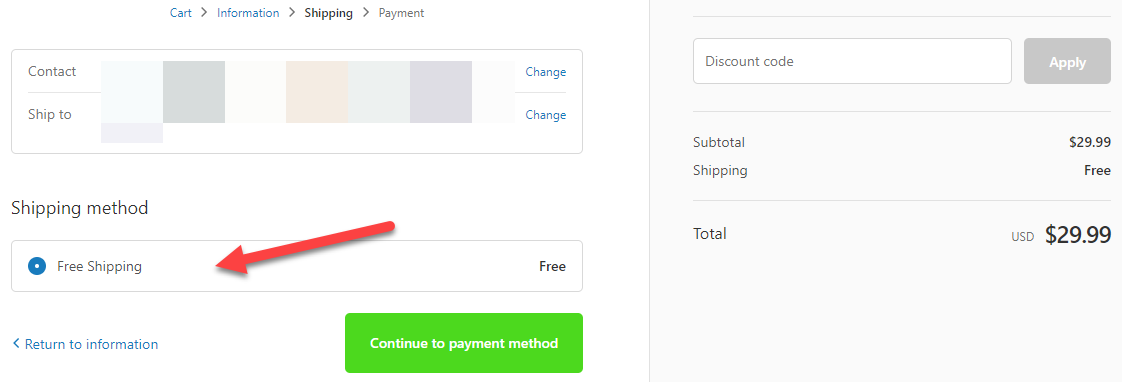
Like the Shipping method which says “Free Shipping” to “Free insured shipping” to ease the mind of your customers. This change will ensure that more people will proceed to the next and final checkout page which is the payment page.
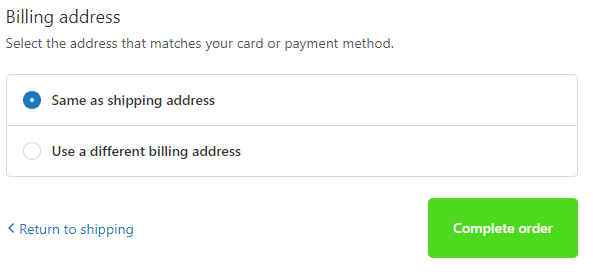
The only thing that I change on the payment page is the button text from “Pay now” which is the default text on Shopify, and a bit too aggressive in my opinion, to “Complete your order” or just “Complete order” which looks much better and has a more positive vibe to it.
Quick tip:
When changing the default texts in the checkout & system tab, please do not scroll manually till you find the text you’re looking for… The page is too long to be manually scrolled so just hold CTRL+F buttons and type the default text that you need to change. This will quickly find you the text box you need ?
And that’s basically it for the texts that you need to change… Remember that customers have a short termed memory so showing a deal once on the front page isn’t enough. It has to follow them almost every step of the way till the final checkout page.
To Sum It Up:
These 5 hacks will guarantee a much smoother experience for your customers on your store and increase your conversion rate. I suggest implementing these hacks on every new store you open in the future to increase your chances of getting quick sales.
I hope you liked the first part of this blog series and see you on the next article with the second one!
Good luck.
Struggling to find good products to sell? Not sure who’s your target audience? Tired of losing money on products you were sure were “winners”?
Then Ecomhunt is what you need! Find hot winning products that are added daily, spy on their ads & stores and import them into your store in 1 click and Start Selling Today!
Must Read Articles:
- 3 Important Things You Can Learn & Discover From A Viral Facebook Ad
- Ecomhunt Trending Products – 3 Products You Should Dropship Right Now!
- 5 Shopify Apps Every Dropshipper Must Have In 2020

Daniel Aloni is one of the leading mentors in the Ecomhunt family. Daniel is a highly experienced Print On Demand seller with multiple 6 figures successful launches.


Hi Daniel, Thanks a lot for your great tips. I’ve learnt a lot.
For the countdown timer on the check out page, is it still possible to do the same modify?
If so, how to do?
Hi Alice!
You can do it by custom coding or simply by installing a conversion boosting app. Search for “checkout timer” and you should find some apps that can do that.
These apps usually come with a trial so you can install them and test if it works out for you.
Good luck 🙂
Hi Daniel, I just want to say thank you for this great article!
I just started a new dropshipping business in Brazil and I’m testing a few products and getting customers to the checkout page but not getting payments.
On my quest to find the reason I found your content and it’s great!
Do you think all of this is still up to date and relevant? And I know it’s mainly based on the US market but it makes a lot of sense worldwide I think.
Best.
Kaue
Hi Kaue,
Yes, the content is definitely still relevant 🙂
Ask me here about your issue with a bit more details and let’s see if I can help you here.
Thanks!